This post may contain affiliate links. Thank you for your support.
This natural DIY weed killer recipe is perfect for killing bindweed and other pesky weeds in your flower beds, and requires just three common ingredients.

I first discovered this natural DIY weed killer years ago while learning how to care for our property and trying to control the weeds in our flower beds. I was constantly finding myself overwhelmed by the number of weeds that needed to be pulled on a daily basis, and was looking for something to help me get ahead of the game without using dangerous, harsh chemicals. You can imagine how thrilled I was when I finally found something that allowed me to kill weeds across large sections of my garden quickly and almost instantly, after trying and failing to keep up with them with other methods. We’ve since added quite a few other garden beds to different areas around our property, and I often still use this recipe when things get a little out of control during the peak of summer. Try my magical, natural weed-killing potion on all your most stubborn weeds in your flower beds, walkway, patio, and driveway, and you’ll be weed-free in no time.
Another garden shortcut to try: How to Safely Use Salt to Kill Weeds
Easy Homemade Weed Killer
Here’s what you’ll need to make the DIY weed killer recipe.
- Regular white vinegar
- Table salt
- Dishwashing liquid
That’s it! Who knew it could be so simple to do away with all those scary, dangerous commercial weed killers? If you want to make your weed killer extra potent, try using cleaning vinegar, which is a type of vinegar with a higher concentration of acetic acid. It’s widely available in supermarkets and hardware stores, or you can order it online.
You’ll also want a basic plastic watering can for application, or you can use a garden sprayer if you want to make a double batch and cover a large area of weeds with great precision.

Mixing the Weed Killing Solution

Mixing the solution is incredibly easy and doesn’t require any heating of any of the components on the stovetop or leaving the solution to sit for an extended time before use. Simply mix the three ingredients directly in the plastic watering can that you’ll be using to apply the mixture to the weeds.
First, pour in a two quarts of vinegar, then add about 1/4 cup salt. Finally, add 2 tablespoons of dishwashing liquid and stir together gently with a long spoon to allow all the ingredients to come together without too many bubbles forming. Once it’s mixed, you’re ready to apply!
Summer garden helper: How to Use Epsom Salt on Roses and Other Plants
Types of Weeds to Kill With This Solution
Back when I was first developing this solution out of sheer desperation, I had a very dense and horrific patch of weeds growing in my back garden that I just couldn’t stay on top of to save my life.
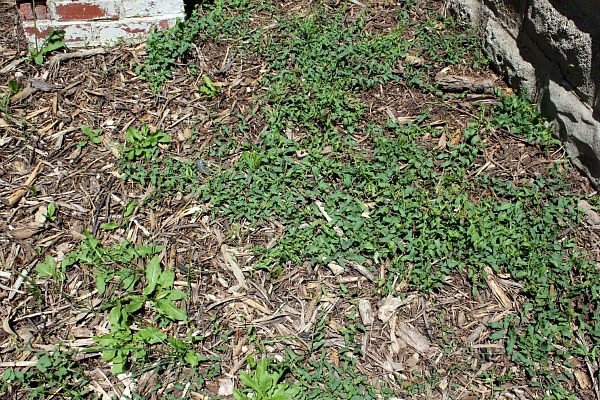
I’m happy to report that this area is now filled with shrubs, perennials, fresh mulch, and only needs very light weeding about once a month. So getting on top of your weed situation really is possible, even if you live out in the country like we do.

Most of the weeds in this patch were something called hedgewood bindweed. Some people will tell you things like “Oh you have weeds? Well, just use vinegar on it!” Or they’ll tell you hot water, or borax, or whatever solution they’ve found for killing bindweed. Let me tell you, none of those things work on this stuff. But this solution? This actually works.
This will also work well on grasses, broadleaf weeds like dandelions, chickweed, and even thistles. Pretty much anything, really.
Beautiful blooming containers: How to Fix Leggy Petunias and Make Them Look Fuller
Applying the DIY Weed Killer
When you’re ready to apply your weed killer, you’ll want to choose your application time wisely for the best results. You’ll find that a nice, hot, sunny day works best to amplify the weed-killing mixture’s capabilities and scorch weeds quickly and effectively. It will still work on a cooler, cloudy day, but a day with sun is best. Definitely avoid rainy days that will see your solution washed away before it has time to be truly effective.
Here’s an example of how the weed-killing solution worked when applied to bindweed in the patch I showed you previously. Things were looking quite thoroughly dead wherever I managed to pour the weed killer, and I was pretty thrilled with the results. On a really hot day, you may see evidence of shriveling and yellowing within a few hours.

It warms my heart. It really does.
How This Works
It may seem like a miracle, but this solution works through basic science. The acid in the vinegar burns the leaves of the plant, the salt desiccates it, and the dishwashing liquid helps to break down the plant’s protective outer layer, leaving it more susceptible to the burning and drying out that I previously mentioned.
This weed killer works to kill the foliage of the weed, but it won’t necessarily get all the way down to the root, especially for very large weeds. When you kill a plant’s foliage, you disrupt photosynthesis and remove a plant’s ability to feed itself and gain strength from the sun’s rays. You will see the plant begin to grow back in a few weeks using residual energy previously stored in the root system, however, after a few applications, the weed will be weakened to the point that no residual energy remains and it will then die back completely. This process will probably take two to three applications, administered a few weeks apart, for most regular weeds.
For easy clean-up after yard maintenance tasks: DIY Gardener’s Hand Scrub in a Mason Jar
No More Harsh Chemicals

Through my readings, I’ve found that people are really scared of salt, even more scared than they are of the harsh, toxic chemicals that you can use to kill your weeds instead. They’re worried about the effects on the surrounding environment and the effects on their hard landscaping materials. While that makes sense in theory, this is not something you should be soaking your whole yard with, just a little patch here and there every once in a while. Honestly, I’m a lot more concerned about the effects of the crazy chemicals on the environment and my family than I am about the pinch of salt. It also should be noted that we use salt liberally on our roads, sidewalks, walkways, and front steps all winter in areas with cooler winters, and no one ever complains about their walkway stones. It’s only when there’s a tiny amount being applied intentionally for a horticultural purpose that people begin getting nervous. I’m not sure why that is, but when you think about it, it just doesn’t make much sense.
The moral of the story? Just use this DIY weed killer and enjoy your weed-free garden beds, patios, and driveways. Nothing being used here is in an amount that will cause any kind of permanent damage, and it’s really no more troublesome to the environment than dropping a container of french fries on your lawn during a bbq. It’s safe for your family and it works, and that’s what matters.
Let me know how this works on the weeds in your area if you give it a try!

Courtenay Hartford is the author of creeklinehouse.com, a blog based on her adventures renovating a 120-year-old farmhouse in rural Ontario, Canada. On her blog, Courtenay shares interior design tips based on her own farmhouse and her work as founder and stylist of the interior photography firm Art & Spaces. She also writes about her farmhouse garden, plant-based recipes, family travel, and homekeeping best practices. Courtenay is the author of the book The Cleaning Ninja and has been featured in numerous magazines including Country Sampler Farmhouse Style, Better Homes and Gardens, Parents Magazine, Real Simple, and Our Homes.
- Courtenay Hartford
- Courtenay Hartford
- Courtenay Hartford
- Courtenay Hartford
- Courtenay Hartford
- Courtenay Hartford
- Courtenay Hartford
- Courtenay Hartford
- Courtenay Hartford
- Courtenay Hartford
- Courtenay Hartford
- Courtenay Hartford
- Courtenay Hartford
- Courtenay Hartford
- Courtenay Hartford
- Courtenay Hartford
- Courtenay Hartford
- Courtenay Hartford
- Courtenay Hartford
- Courtenay Hartford
- Courtenay Hartford
- Courtenay Hartford
- Courtenay Hartford
- Courtenay Hartford
- Courtenay Hartford
- Courtenay Hartford
- Courtenay Hartford
- Courtenay Hartford
- Courtenay Hartford
- Courtenay Hartford
- Courtenay Hartford
- Courtenay Hartford
- Courtenay Hartford
- Courtenay Hartford
- Courtenay Hartford
- Courtenay Hartford
- Courtenay Hartford
- Courtenay Hartford
- Courtenay Hartford
- Courtenay Hartford
- Courtenay Hartford
- Courtenay Hartford
- Courtenay Hartford
- Courtenay Hartford
- Courtenay Hartford
- Courtenay Hartford
- Courtenay Hartford
- Courtenay Hartford
- Courtenay Hartford
- Courtenay Hartford
- Courtenay Hartford
- Courtenay Hartford
- Courtenay Hartford
- Courtenay Hartford
- Courtenay Hartford
- Courtenay Hartford
- Courtenay Hartford
- Courtenay Hartford
- Courtenay Hartford
- Courtenay Hartford
- Courtenay Hartford
- Courtenay Hartford
- Courtenay Hartford
- Courtenay Hartford
- Courtenay Hartford
- Courtenay Hartford
- Courtenay Hartford
- Courtenay Hartford
- Courtenay Hartford
- Courtenay Hartford
- Courtenay Hartford
- Courtenay Hartford
- Courtenay Hartford
- Courtenay Hartford
- Courtenay Hartford
- Courtenay Hartford
- Courtenay Hartford
- Courtenay Hartford
- Courtenay Hartford
- Courtenay Hartford
- Courtenay Hartford
- Courtenay Hartford
- Courtenay Hartford
- Courtenay Hartford
- Courtenay Hartford
- Courtenay Hartford
- Courtenay Hartford
- Courtenay Hartford
- Courtenay Hartford
- Courtenay Hartford
- Courtenay Hartford
- Courtenay Hartford
- Courtenay Hartford
- Courtenay Hartford
- Courtenay Hartford
- Courtenay Hartford
- Courtenay Hartford
- Courtenay Hartford
- Courtenay Hartford
- Courtenay Hartford
- Courtenay Hartford
- Courtenay Hartford
- Courtenay Hartford
- Courtenay Hartford
- Courtenay Hartford
- Courtenay Hartford
- Courtenay Hartford
- Courtenay Hartford
- Courtenay Hartford
- Courtenay Hartford
- Courtenay Hartford
- Courtenay Hartford
- Courtenay Hartford
- Courtenay Hartford
- Courtenay Hartford
- Courtenay Hartford
- Courtenay Hartford
- Courtenay Hartford
- Courtenay Hartford
- Courtenay Hartford
- Courtenay Hartford
- Courtenay Hartford
- Courtenay Hartford
- Courtenay Hartford
- Courtenay Hartford
- Courtenay Hartford
- Courtenay Hartford
- Courtenay Hartford
- Courtenay Hartford
- Courtenay Hartford
- Courtenay Hartford
- Courtenay Hartford
- Courtenay Hartford
- Courtenay Hartford
- Courtenay Hartford
- Courtenay Hartford
- Courtenay Hartford
- Courtenay Hartford
- Courtenay Hartford
- Courtenay Hartford
- Courtenay Hartford
- Courtenay Hartford
- Courtenay Hartford
- Courtenay Hartford
- Courtenay Hartford
- Courtenay Hartford
- Courtenay Hartford
- Courtenay Hartford
- Courtenay Hartford
- Courtenay Hartford
- Courtenay Hartford
- Courtenay Hartford
- Courtenay Hartford
- Courtenay Hartford
- Courtenay Hartford
- Courtenay Hartford
- Courtenay Hartford
- Courtenay Hartford
- Courtenay Hartford
- Courtenay Hartford
- Courtenay Hartford
- Courtenay Hartford
- Courtenay Hartford
- Courtenay Hartford
- Courtenay Hartford
- Courtenay Hartford
- Courtenay Hartford
- Courtenay Hartford
- Courtenay Hartford
- Courtenay Hartford
- Courtenay Hartford
- Courtenay Hartford
- Courtenay Hartford
- Courtenay Hartford
- Courtenay Hartford
- Courtenay Hartford
- Courtenay Hartford
- Courtenay Hartford
- Courtenay Hartford
- Courtenay Hartford
- Courtenay Hartford
- Courtenay Hartford
- Courtenay Hartford
- Courtenay Hartford
- Courtenay Hartford
- Courtenay Hartford
- Courtenay Hartford
- Courtenay Hartford
- Courtenay Hartford
- Courtenay Hartford
- Courtenay Hartford
- Courtenay Hartford
- Courtenay Hartford
- Courtenay Hartford
- Courtenay Hartford
- Courtenay Hartford
- Courtenay Hartford
- Courtenay Hartford
- Courtenay Hartford
- Courtenay Hartford
- Courtenay Hartford
- Courtenay Hartford
- Courtenay Hartford
- Courtenay Hartford
- Courtenay Hartford
- Courtenay Hartford
- Courtenay Hartford
- Courtenay Hartford
- Courtenay Hartford
- Courtenay Hartford
- Courtenay Hartford
- Courtenay Hartford
- Courtenay Hartford
- Courtenay Hartford
- Courtenay Hartford
- Courtenay Hartford
- Courtenay Hartford
- Courtenay Hartford
- Courtenay Hartford
- Courtenay Hartford
- Courtenay Hartford
- Courtenay Hartford
- Courtenay Hartford
- Courtenay Hartford
- Courtenay Hartford
- Courtenay Hartford
- Courtenay Hartford
- Courtenay Hartford
- Courtenay Hartford
- Courtenay Hartford
- Courtenay Hartford
- Courtenay Hartford
- Courtenay Hartford
- Courtenay Hartford
- Courtenay Hartford
- Courtenay Hartford
- Courtenay Hartford
- Courtenay Hartford
- Courtenay Hartford
- Courtenay Hartford
- Courtenay Hartford
- Courtenay Hartford
- Courtenay Hartford
- Courtenay Hartford
- Courtenay Hartford
- Courtenay Hartford
- Courtenay Hartford
- Courtenay Hartford
- Courtenay Hartford
- Courtenay Hartford
- Courtenay Hartford
- Courtenay Hartford
- Courtenay Hartford
- Courtenay Hartford
- Courtenay Hartford
- Courtenay Hartford
- Courtenay Hartford
- Courtenay Hartford
- Courtenay Hartford
- Courtenay Hartford
- Courtenay Hartford
- Courtenay Hartford
- Courtenay Hartford
- Courtenay Hartford
- Courtenay Hartford
- Courtenay Hartford
- Courtenay Hartford
- Courtenay Hartford
- Courtenay Hartford
- Courtenay Hartford
- Courtenay Hartford
- Courtenay Hartford
- Courtenay Hartford
- Courtenay Hartford
- Courtenay Hartford
- Courtenay Hartford
- Courtenay Hartford
- Courtenay Hartford
- Courtenay Hartford
- Courtenay Hartford
- Courtenay Hartford
- Courtenay Hartford
- Courtenay Hartford
- Courtenay Hartford
- Courtenay Hartford
- Courtenay Hartford
- Courtenay Hartford
- Courtenay Hartford
- Courtenay Hartford
- Courtenay Hartford
- Courtenay Hartford
- Courtenay Hartford
- Courtenay Hartford
- Courtenay Hartford
- Courtenay Hartford
- Courtenay Hartford
- Courtenay Hartford
- Courtenay Hartford
- Courtenay Hartford
- Courtenay Hartford
- Courtenay Hartford
- Courtenay Hartford
- Courtenay Hartford
- Courtenay Hartford
- Courtenay Hartford
- Courtenay Hartford
- Courtenay Hartford
- Courtenay Hartford
- Courtenay Hartford
- Courtenay Hartford
- Courtenay Hartford
- Courtenay Hartford
- Courtenay Hartford
- Courtenay Hartford
- Courtenay Hartford
- Courtenay Hartford
- Courtenay Hartford
- Courtenay Hartford
- Courtenay Hartford
- Courtenay Hartford
- Courtenay Hartford
- Courtenay Hartford
- Courtenay Hartford
- Courtenay Hartford
- Courtenay Hartford
- Courtenay Hartford
- Courtenay Hartford
- Courtenay Hartford
- Courtenay Hartford
- Courtenay Hartford
- Courtenay Hartford
- Courtenay Hartford
- Courtenay Hartford
- Courtenay Hartford
- Courtenay Hartford
- Courtenay Hartford
- Courtenay Hartford
- Courtenay Hartford
- Courtenay Hartford
- Courtenay Hartford
- Courtenay Hartford
- Courtenay Hartford
- Courtenay Hartford
- Courtenay Hartford
- Courtenay Hartford
- Courtenay Hartford
- Courtenay Hartford
- Courtenay Hartford
- Courtenay Hartford
- Courtenay Hartford
- Courtenay Hartford
- Courtenay Hartford
- Courtenay Hartford
- Courtenay Hartford
- Courtenay Hartford
- Courtenay Hartford
- Courtenay Hartford
- Courtenay Hartford
- Courtenay Hartford
- Courtenay Hartford
- Courtenay Hartford
- Courtenay Hartford
- Courtenay Hartford
- Courtenay Hartford
- Courtenay Hartford
- Courtenay Hartford
- Courtenay Hartford
- Courtenay Hartford
- Courtenay Hartford
- Courtenay Hartford
- Courtenay Hartford
- Courtenay Hartford
- Courtenay Hartford
- Courtenay Hartford
- Courtenay Hartford
- Courtenay Hartford
- Courtenay Hartford
- Courtenay Hartford
- Courtenay Hartford
- Courtenay Hartford
- Courtenay Hartford
- Courtenay Hartford
- Courtenay Hartford
- Courtenay Hartford
- Courtenay Hartford
- Courtenay Hartford
- Courtenay Hartford
- Courtenay Hartford
- Courtenay Hartford
- Courtenay Hartford
- Courtenay Hartford
- Courtenay Hartford
- Courtenay Hartford
- Courtenay Hartford
- Courtenay Hartford
- Courtenay Hartford
- Courtenay Hartford
- Courtenay Hartford
- Courtenay Hartford
- Courtenay Hartford
- Courtenay Hartford
- Courtenay Hartford
- Courtenay Hartford
- Courtenay Hartford
- Courtenay Hartford
- Courtenay Hartford
- Courtenay Hartford
- Courtenay Hartford
- Courtenay Hartford
- Courtenay Hartford
- Courtenay Hartford
- Courtenay Hartford
- Courtenay Hartford
- Courtenay Hartford
- Courtenay Hartford
- Courtenay Hartford
- Courtenay Hartford
- Courtenay Hartford
- Courtenay Hartford
- Courtenay Hartford
- Courtenay Hartford
- Courtenay Hartford
- Courtenay Hartford
- Courtenay Hartford
- Courtenay Hartford
- Courtenay Hartford
- Courtenay Hartford
- Courtenay Hartford
- Courtenay Hartford
- Courtenay Hartford
- Courtenay Hartford
- Courtenay Hartford
- Courtenay Hartford
- Courtenay Hartford
- Courtenay Hartford
- Courtenay Hartford
- Courtenay Hartford
- Courtenay Hartford
- Courtenay Hartford
- Courtenay Hartford
- Courtenay Hartford
- Courtenay Hartford
- Courtenay Hartford
- Courtenay Hartford
- Courtenay Hartford
- Courtenay Hartford
- Courtenay Hartford
- Courtenay Hartford
- Courtenay Hartford
- Courtenay Hartford
- Courtenay Hartford
- Courtenay Hartford
- Courtenay Hartford
- Courtenay Hartford
- Courtenay Hartford
- Courtenay Hartford
- Courtenay Hartford
- Courtenay Hartford
- Courtenay Hartford
- Courtenay Hartford
- Courtenay Hartford
- Courtenay Hartford
- Courtenay Hartford
- Courtenay Hartford
- Courtenay Hartford
- Courtenay Hartford
- Courtenay Hartford
- Courtenay Hartford
- Courtenay Hartford
- Courtenay Hartford
- Courtenay Hartford
- Courtenay Hartford
- Courtenay Hartford
- Courtenay Hartford
- Courtenay Hartford
- Courtenay Hartford
- Courtenay Hartford
- Courtenay Hartford
- Courtenay Hartford
- Courtenay Hartford
- Courtenay Hartford
- Courtenay Hartford
- Courtenay Hartford
- Courtenay Hartford
- Courtenay Hartford
- Courtenay Hartford
- Courtenay Hartford
- Courtenay Hartford
- Courtenay Hartford
- Courtenay Hartford
- Courtenay Hartford
- Courtenay Hartford
- Courtenay Hartford
- Courtenay Hartford
- Courtenay Hartford
- Courtenay Hartford
- Courtenay Hartford
- Courtenay Hartford
- Courtenay Hartford
- Courtenay Hartford
- Courtenay Hartford
- Courtenay Hartford
- Courtenay Hartford
- Courtenay Hartford
- Courtenay Hartford
- Courtenay Hartford
- Courtenay Hartford
- Courtenay Hartford
- Courtenay Hartford
- Courtenay Hartford
- Courtenay Hartford
- Courtenay Hartford
- Courtenay Hartford
- Courtenay Hartford
- Courtenay Hartford
- Courtenay Hartford
- Courtenay Hartford
- Courtenay Hartford
- Courtenay Hartford
- Courtenay Hartford
- Courtenay Hartford
- Courtenay Hartford
- Courtenay Hartford
- Courtenay Hartford
- Courtenay Hartford
- Courtenay Hartford
- Courtenay Hartford
- Courtenay Hartford
- Courtenay Hartford
- Courtenay Hartford
- Courtenay Hartford
- Courtenay Hartford
- Courtenay Hartford
- Courtenay Hartford
- Courtenay Hartford
- Courtenay Hartford
- Courtenay Hartford
- Courtenay Hartford
- Courtenay Hartford
- Courtenay Hartford
- Courtenay Hartford
- Courtenay Hartford
- Courtenay Hartford
- Courtenay Hartford
- Courtenay Hartford
- Courtenay Hartford
- Courtenay Hartford
- Courtenay Hartford
- Courtenay Hartford
- Courtenay Hartford
- Courtenay Hartford
- Courtenay Hartford
- Courtenay Hartford
- Courtenay Hartford
- Courtenay Hartford
- Courtenay Hartford
- Courtenay Hartford
- Courtenay Hartford
- Courtenay Hartford
- Courtenay Hartford
- Courtenay Hartford
- Courtenay Hartford
- Courtenay Hartford
- Courtenay Hartford
- Courtenay Hartford
- Courtenay Hartford
- Courtenay Hartford
- Courtenay Hartford
- Courtenay Hartford
- Courtenay Hartford
- Courtenay Hartford
- Courtenay Hartford
- Courtenay Hartford
- Courtenay Hartford
- Courtenay Hartford
- Courtenay Hartford
- Courtenay Hartford
- Courtenay Hartford
- Courtenay Hartford
- Courtenay Hartford
- Courtenay Hartford
- Courtenay Hartford
- Courtenay Hartford
- Courtenay Hartford
- Courtenay Hartford
- Courtenay Hartford
- Courtenay Hartford
- Courtenay Hartford
- Courtenay Hartford
- Courtenay Hartford
- Courtenay Hartford
- Courtenay Hartford
- Courtenay Hartford
- Courtenay Hartford
- Courtenay Hartford
- Courtenay Hartford
- Courtenay Hartford
- Courtenay Hartford
- Courtenay Hartford
- Courtenay Hartford
- Courtenay Hartford
- Courtenay Hartford
- Courtenay Hartford
- Courtenay Hartford
- Courtenay Hartford
- Courtenay Hartford
- Courtenay Hartford
- Courtenay Hartford
- Courtenay Hartford
- Courtenay Hartford
- Courtenay Hartford
- Courtenay Hartford
- Courtenay Hartford
- Courtenay Hartford
- Courtenay Hartford
- Courtenay Hartford
- Courtenay Hartford
- Courtenay Hartford
- Courtenay Hartford
- Courtenay Hartford
- Courtenay Hartford
- Courtenay Hartford
- Courtenay Hartford
- Courtenay Hartford
- Courtenay Hartford
- Courtenay Hartford
- Courtenay Hartford
- Courtenay Hartford
- Courtenay Hartford
- Courtenay Hartford
- Courtenay Hartford
- Courtenay Hartford
- Courtenay Hartford
- Courtenay Hartford
- Courtenay Hartford
- Courtenay Hartford
- Courtenay Hartford
- Courtenay Hartford
- Courtenay Hartford
- Courtenay Hartford
- Courtenay Hartford
- Courtenay Hartford
- Courtenay Hartford
- Courtenay Hartford
- Courtenay Hartford
- Courtenay Hartford
- Courtenay Hartford
- Courtenay Hartford
- Courtenay Hartford
- Courtenay Hartford
- Courtenay Hartford
- Courtenay Hartford
- Courtenay Hartford
- Courtenay Hartford
- Courtenay Hartford
- Courtenay Hartford
- Courtenay Hartford
- Courtenay Hartford
- Courtenay Hartford
- Courtenay Hartford
- Courtenay Hartford
- Courtenay Hartford
- Courtenay Hartford
- Courtenay Hartford
- Courtenay Hartford
- Courtenay Hartford
- Courtenay Hartford
- Courtenay Hartford
- Courtenay Hartford
- Courtenay Hartford
- Courtenay Hartford
- Courtenay Hartford
- Courtenay Hartford
- Courtenay Hartford
- Courtenay Hartford
- Courtenay Hartford
- Courtenay Hartford
- Courtenay Hartford
- Courtenay Hartford
- Courtenay Hartford
- Courtenay Hartford
- Courtenay Hartford
- Courtenay Hartford
- Courtenay Hartford
- Courtenay Hartford
- Courtenay Hartford
- Courtenay Hartford
- Courtenay Hartford
- Courtenay Hartford
- Courtenay Hartford
- Courtenay Hartford
- Courtenay Hartford
- Courtenay Hartford
- Courtenay Hartford
- Courtenay Hartford
- Courtenay Hartford
- Courtenay Hartford
- Courtenay Hartford
- Courtenay Hartford
- Courtenay Hartford
- Courtenay Hartford
- Courtenay Hartford
- Courtenay Hartford
- Courtenay Hartford
- Courtenay Hartford
- Courtenay Hartford
- Courtenay Hartford
- Courtenay Hartford
- Courtenay Hartford
- Courtenay Hartford
- Courtenay Hartford
- Courtenay Hartford
- Courtenay Hartford
- Courtenay Hartford
- Courtenay Hartford
- Courtenay Hartford
- Courtenay Hartford
- Courtenay Hartford
- Courtenay Hartford
- Courtenay Hartford
- Courtenay Hartford
- Courtenay Hartford
- Courtenay Hartford
- Courtenay Hartford
- Courtenay Hartford
- Courtenay Hartford
- Courtenay Hartford
- Courtenay Hartford
- Courtenay Hartford
- Courtenay Hartford
- Courtenay Hartford
- Courtenay Hartford
- Courtenay Hartford
- Courtenay Hartford
- Courtenay Hartford
- Courtenay Hartford
- Courtenay Hartford
- Courtenay Hartford
- Courtenay Hartford
- Courtenay Hartford
- Courtenay Hartford
- Courtenay Hartford
- Courtenay Hartford
- Courtenay Hartford
- Courtenay Hartford
- Courtenay Hartford
- Courtenay Hartford
- Courtenay Hartford
- Courtenay Hartford
- Courtenay Hartford
- Courtenay Hartford
- Courtenay Hartford
- Courtenay Hartford
- Courtenay Hartford
- Courtenay Hartford
- Courtenay Hartford
- Courtenay Hartford
- Courtenay Hartford
- Courtenay Hartford
- Courtenay Hartford
- Courtenay Hartford
- Courtenay Hartford
- Courtenay Hartford
- Courtenay Hartford
- Courtenay Hartford
- Courtenay Hartford
- Courtenay Hartford
- Courtenay Hartford
- Courtenay Hartford
- Courtenay Hartford
- Courtenay Hartford
- Courtenay Hartford
- Courtenay Hartford
- Courtenay Hartford
- Courtenay Hartford
- Courtenay Hartford
- Courtenay Hartford
- Courtenay Hartford
- Courtenay Hartford
- Courtenay Hartford
- Courtenay Hartford
- Courtenay Hartford
- Courtenay Hartford
- Courtenay Hartford
- Courtenay Hartford
- Courtenay Hartford
- Courtenay Hartford
- Courtenay Hartford
- Courtenay Hartford
- Courtenay Hartford
- Courtenay Hartford
- Courtenay Hartford
- Courtenay Hartford
- Courtenay Hartford
- Courtenay Hartford
- Courtenay Hartford
- Courtenay Hartford
- Courtenay Hartford
- Courtenay Hartford
- Courtenay Hartford
- Courtenay Hartford
- Courtenay Hartford
- Courtenay Hartford
- Courtenay Hartford
- Courtenay Hartford
- Courtenay Hartford
- Courtenay Hartford
- Courtenay Hartford
- Courtenay Hartford
- Courtenay Hartford
- Courtenay Hartford
- Courtenay Hartford
- Courtenay Hartford
- Courtenay Hartford
- Courtenay Hartford
- Courtenay Hartford
- Courtenay Hartford
- Courtenay Hartford
- Courtenay Hartford
- Courtenay Hartford
- Courtenay Hartford
- Courtenay Hartford
- Courtenay Hartford
- Courtenay Hartford
- Courtenay Hartford
- Courtenay Hartford
- Courtenay Hartford
- Courtenay Hartford
- Courtenay Hartford
- Courtenay Hartford
- Courtenay Hartford
- Courtenay Hartford
- Courtenay Hartford
- Courtenay Hartford
- Courtenay Hartford
- Courtenay Hartford
- Courtenay Hartford
- Courtenay Hartford
- Courtenay Hartford
- Courtenay Hartford
- Courtenay Hartford
- Courtenay Hartford
- Courtenay Hartford
- Courtenay Hartford
- Courtenay Hartford
- Courtenay Hartford
- Courtenay Hartford
- Courtenay Hartford
- Courtenay Hartford
- Courtenay Hartford
- Courtenay Hartford
- Courtenay Hartford
- Courtenay Hartford
- Courtenay Hartford
- Courtenay Hartford
- Courtenay Hartford
- Courtenay Hartford
- Courtenay Hartford
- Courtenay Hartford
- Courtenay Hartford
- Courtenay Hartford
- Courtenay Hartford
- Courtenay Hartford
- Courtenay Hartford
- Courtenay Hartford
- Courtenay Hartford
- Courtenay Hartford
- Courtenay Hartford
- Courtenay Hartford
- Courtenay Hartford
- Courtenay Hartford
- Courtenay Hartford
- Courtenay Hartford
- Courtenay Hartford
- Courtenay Hartford
- Courtenay Hartford
- Courtenay Hartford
- Courtenay Hartford
- Courtenay Hartford
- Courtenay Hartford
- Courtenay Hartford
- Courtenay Hartford
- Courtenay Hartford
- Courtenay Hartford
- Courtenay Hartford
- Courtenay Hartford
- Courtenay Hartford
- Courtenay Hartford
- Courtenay Hartford
- Courtenay Hartford
- Courtenay Hartford
- Courtenay Hartford
- Courtenay Hartford
- Courtenay Hartford
- Courtenay Hartford
- Courtenay Hartford
- Courtenay Hartford
- Courtenay Hartford
- Courtenay Hartford
- Courtenay Hartford
- Courtenay Hartford
- Courtenay Hartford
- Courtenay Hartford
- Courtenay Hartford
- Courtenay Hartford
- Courtenay Hartford
- Courtenay Hartford
- Courtenay Hartford
- Courtenay Hartford
- Courtenay Hartford
- Courtenay Hartford
- Courtenay Hartford
- Courtenay Hartford
- Courtenay Hartford
- Courtenay Hartford
- Courtenay Hartford
- Courtenay Hartford
- Courtenay Hartford
- Courtenay Hartford
- Courtenay Hartford
- Courtenay Hartford
- Courtenay Hartford
- Courtenay Hartford
- Courtenay Hartford
- Courtenay Hartford
- Courtenay Hartford
- Courtenay Hartford
- Courtenay Hartford
- Courtenay Hartford
- Courtenay Hartford
- Courtenay Hartford
- Courtenay Hartford
- Courtenay Hartford
- Courtenay Hartford
- Courtenay Hartford
- Courtenay Hartford
- Courtenay Hartford
- Courtenay Hartford
- Courtenay Hartford
- Courtenay Hartford
- Courtenay Hartford
- Courtenay Hartford
- Courtenay Hartford
- Courtenay Hartford
- Courtenay Hartford
- Courtenay Hartford
- Courtenay Hartford
- Courtenay Hartford
- Courtenay Hartford
- Courtenay Hartford
- Courtenay Hartford
- Courtenay Hartford
- Courtenay Hartford
- Courtenay Hartford
- Courtenay Hartford
- Courtenay Hartford
- Courtenay Hartford
- Courtenay Hartford
- Courtenay Hartford
- Courtenay Hartford
- Courtenay Hartford
- Courtenay Hartford
- Courtenay Hartford
- Courtenay Hartford
- Courtenay Hartford
- Courtenay Hartford
- Courtenay Hartford
- Courtenay Hartford
- Courtenay Hartford
- Courtenay Hartford
- Courtenay Hartford
- Courtenay Hartford
- Courtenay Hartford
- Courtenay Hartford
- Courtenay Hartford
- Courtenay Hartford
- Courtenay Hartford
- Courtenay Hartford
- Courtenay Hartford
- Courtenay Hartford
- Courtenay Hartford
- Courtenay Hartford
- Courtenay Hartford
- Courtenay Hartford
- Courtenay Hartford
- Courtenay Hartford
- Courtenay Hartford
- Courtenay Hartford
- Courtenay Hartford
- Courtenay Hartford
- Courtenay Hartford
- Courtenay Hartford
- Courtenay Hartford
- Courtenay Hartford
- Courtenay Hartford
- Courtenay Hartford
- Courtenay Hartford
- Courtenay Hartford
- Courtenay Hartford
- Courtenay Hartford
- Courtenay Hartford
- Courtenay Hartford
- Courtenay Hartford
- Courtenay Hartford
- Courtenay Hartford
- Courtenay Hartford
- Courtenay Hartford
- Courtenay Hartford
- Courtenay Hartford
- Courtenay Hartford
- Courtenay Hartford
- Courtenay Hartford
- Courtenay Hartford
- Courtenay Hartford
- Courtenay Hartford
- Courtenay Hartford
- Courtenay Hartford
- Courtenay Hartford
- Courtenay Hartford
- Courtenay Hartford
- Courtenay Hartford
- Courtenay Hartford
- Courtenay Hartford
- Courtenay Hartford
- Courtenay Hartford
- Courtenay Hartford
- Courtenay Hartford
- Courtenay Hartford
- Courtenay Hartford
- Courtenay Hartford
- Courtenay Hartford
- Courtenay Hartford
- Courtenay Hartford
- Courtenay Hartford
- Courtenay Hartford
- Courtenay Hartford
- Courtenay Hartford
- Courtenay Hartford
- Courtenay Hartford
- Courtenay Hartford
- Courtenay Hartford
- Courtenay Hartford
- Courtenay Hartford
- Courtenay Hartford
- Courtenay Hartford
- Courtenay Hartford
- Courtenay Hartford
- Courtenay Hartford
- Courtenay Hartford
- Courtenay Hartford
- Courtenay Hartford
- Courtenay Hartford
- Courtenay Hartford
- Courtenay Hartford
- Courtenay Hartford
- Courtenay Hartford
- Courtenay Hartford
- Courtenay Hartford
- Courtenay Hartford
- Courtenay Hartford
- Courtenay Hartford
- Courtenay Hartford
- Courtenay Hartford
- Courtenay Hartford
- Courtenay Hartford
- Courtenay Hartford
- Courtenay Hartford
- Courtenay Hartford
- Courtenay Hartford
- Courtenay Hartford
- Courtenay Hartford
- Courtenay Hartford
- Courtenay Hartford
- Courtenay Hartford
- Courtenay Hartford
- Courtenay Hartford
- Courtenay Hartford
- Courtenay Hartford
- Courtenay Hartford
- Courtenay Hartford
- Courtenay Hartford
- Courtenay Hartford
- Courtenay Hartford
- Courtenay Hartford
- Courtenay Hartford
- Courtenay Hartford
- Courtenay Hartford
- Courtenay Hartford
- Courtenay Hartford
- Courtenay Hartford
- Courtenay Hartford
- Courtenay Hartford
- Courtenay Hartford
- Courtenay Hartford
- Courtenay Hartford
- Courtenay Hartford
- Courtenay Hartford
- Courtenay Hartford
- Courtenay Hartford
- Courtenay Hartford
- Courtenay Hartford
- Courtenay Hartford
- Courtenay Hartford
- Courtenay Hartford
- Courtenay Hartford
- Courtenay Hartford
- Courtenay Hartford
- Courtenay Hartford
- Courtenay Hartford
- Courtenay Hartford
- Courtenay Hartford
- Courtenay Hartford
- Courtenay Hartford
- Courtenay Hartford
- Courtenay Hartford
- Courtenay Hartford
- Courtenay Hartford
- Courtenay Hartford
- Courtenay Hartford
- Courtenay Hartford
- Courtenay Hartford
- Courtenay Hartford
- Courtenay Hartford
- Courtenay Hartford
- Courtenay Hartford
- Courtenay Hartford
- Courtenay Hartford
- Courtenay Hartford
- Courtenay Hartford
- Courtenay Hartford
- Courtenay Hartford
- Courtenay Hartford
- Courtenay Hartford
- Courtenay Hartford
- Courtenay Hartford
- Courtenay Hartford
- Courtenay Hartford
- Courtenay Hartford
- Courtenay Hartford
- Courtenay Hartford
- Courtenay Hartford
- Courtenay Hartford
- Courtenay Hartford
- Courtenay Hartford
- Courtenay Hartford
- Courtenay Hartford
- Courtenay Hartford
- Courtenay Hartford
- Courtenay Hartford
- Courtenay Hartford
- Courtenay Hartford
- Courtenay Hartford
- Courtenay Hartford
- Courtenay Hartford
- Courtenay Hartford
- Courtenay Hartford
- Courtenay Hartford
- Courtenay Hartford
- Courtenay Hartford
- Courtenay Hartford
- Courtenay Hartford
- Courtenay Hartford
- Courtenay Hartford
- Courtenay Hartford
- Courtenay Hartford
- Courtenay Hartford
- Courtenay Hartford
- Courtenay Hartford
- Courtenay Hartford
- Courtenay Hartford
- Courtenay Hartford
- Courtenay Hartford
- Courtenay Hartford
- Courtenay Hartford
- Courtenay Hartford
- Courtenay Hartford
- Courtenay Hartford
- Courtenay Hartford
- Courtenay Hartford
- Courtenay Hartford
- Courtenay Hartford
- Courtenay Hartford
- Courtenay Hartford
- Courtenay Hartford
- Courtenay Hartford
- Courtenay Hartford
- Courtenay Hartford
- Courtenay Hartford
- Courtenay Hartford
- Courtenay Hartford
- Courtenay Hartford
- Courtenay Hartford
- Courtenay Hartford
- Courtenay Hartford
- Courtenay Hartford
- Courtenay Hartford
- Courtenay Hartford
- Courtenay Hartford
- Courtenay Hartford
- Courtenay Hartford
- Courtenay Hartford
- Courtenay Hartford
- Courtenay Hartford
- Courtenay Hartford
- Courtenay Hartford
- Courtenay Hartford
- Courtenay Hartford
- Courtenay Hartford
- Courtenay Hartford
- Courtenay Hartford
- Courtenay Hartford
- Courtenay Hartford
- Courtenay Hartford
- Courtenay Hartford
- Courtenay Hartford
- Courtenay Hartford
- Courtenay Hartford
- Courtenay Hartford
- Courtenay Hartford
- Courtenay Hartford
- Courtenay Hartford
- Courtenay Hartford
- Courtenay Hartford
- Courtenay Hartford
- Courtenay Hartford
- Courtenay Hartford
- Courtenay Hartford
- Courtenay Hartford
- Courtenay Hartford
- Courtenay Hartford
- Courtenay Hartford
- Courtenay Hartford
- Courtenay Hartford
- Courtenay Hartford
- Courtenay Hartford
- Courtenay Hartford
- Courtenay Hartford
- Courtenay Hartford
- Courtenay Hartford
- Courtenay Hartford
- Courtenay Hartford
- Courtenay Hartford
- Courtenay Hartford
- Courtenay Hartford
- Courtenay Hartford
- Courtenay Hartford
- Courtenay Hartford
- Courtenay Hartford
- Courtenay Hartford
- Courtenay Hartford
- Courtenay Hartford
- Courtenay Hartford
- Courtenay Hartford
- Courtenay Hartford
- Courtenay Hartford
- Courtenay Hartford
- Courtenay Hartford
- Courtenay Hartford
- Courtenay Hartford
- Courtenay Hartford
- Courtenay Hartford
- Courtenay Hartford
- Courtenay Hartford
- Courtenay Hartford
- Courtenay Hartford
- Courtenay Hartford
- Courtenay Hartford
- Courtenay Hartford
- Courtenay Hartford
- Courtenay Hartford
- Courtenay Hartford
- Courtenay Hartford
- Courtenay Hartford
- Courtenay Hartford
- Courtenay Hartford
- Courtenay Hartford
- Courtenay Hartford
- Courtenay Hartford
- Courtenay Hartford
- Courtenay Hartford
- Courtenay Hartford
- Courtenay Hartford
- Courtenay Hartford
- Courtenay Hartford
- Courtenay Hartford
- Courtenay Hartford
- Courtenay Hartford
- Courtenay Hartford
- Courtenay Hartford
- Courtenay Hartford
- Courtenay Hartford
- Courtenay Hartford
- Courtenay Hartford
- Courtenay Hartford
- Courtenay Hartford
- Courtenay Hartford
- Courtenay Hartford
- Courtenay Hartford
- Courtenay Hartford
- Courtenay Hartford
- Courtenay Hartford
- Courtenay Hartford
- Courtenay Hartford
- Courtenay Hartford
- Courtenay Hartford
- Courtenay Hartford
- Courtenay Hartford
- Courtenay Hartford
- Courtenay Hartford
- Courtenay Hartford
- Courtenay Hartford
- Courtenay Hartford
- Courtenay Hartford
- Courtenay Hartford
- Courtenay Hartford
- Courtenay Hartford
- Courtenay Hartford
- Courtenay Hartford
- Courtenay Hartford
- Courtenay Hartford
- Courtenay Hartford
- Courtenay Hartford
- Courtenay Hartford
- Courtenay Hartford
- Courtenay Hartford
- Courtenay Hartford
- Courtenay Hartford
- Courtenay Hartford
- Courtenay Hartford
- Courtenay Hartford
- Courtenay Hartford
- Courtenay Hartford
- Courtenay Hartford
- Courtenay Hartford
- Courtenay Hartford
- Courtenay Hartford
- Courtenay Hartford
- Courtenay Hartford
- Courtenay Hartford
- Courtenay Hartford
- Courtenay Hartford
- Courtenay Hartford
- Courtenay Hartford
- Courtenay Hartford
- Courtenay Hartford
- Courtenay Hartford
- Courtenay Hartford
- Courtenay Hartford
- Courtenay Hartford
- Courtenay Hartford
- Courtenay Hartford
- Courtenay Hartford
- Courtenay Hartford
- Courtenay Hartford
- Courtenay Hartford
- Courtenay Hartford
- Courtenay Hartford
- Courtenay Hartford
- Courtenay Hartford
- Courtenay Hartford
- Courtenay Hartford
- Courtenay Hartford
- Courtenay Hartford
- Courtenay Hartford
- Courtenay Hartford
- Courtenay Hartford
- Courtenay Hartford
- Courtenay Hartford
- Courtenay Hartford
- Courtenay Hartford
- Courtenay Hartford
- Courtenay Hartford
- Courtenay Hartford
- Courtenay Hartford
- Courtenay Hartford
- Courtenay Hartford
- Courtenay Hartford
- Courtenay Hartford
- Courtenay Hartford
- Courtenay Hartford
- Courtenay Hartford
- Courtenay Hartford
- Courtenay Hartford
- Courtenay Hartford
- Courtenay Hartford
- Courtenay Hartford
- Courtenay Hartford
- Courtenay Hartford
- Courtenay Hartford
- Courtenay Hartford
- Courtenay Hartford
- Courtenay Hartford
- Courtenay Hartford
- Courtenay Hartford
- Courtenay Hartford
- Courtenay Hartford
- Courtenay Hartford
- Courtenay Hartford
- Courtenay Hartford
- Courtenay Hartford
- Courtenay Hartford
- Courtenay Hartford
- Courtenay Hartford
- Courtenay Hartford
- Courtenay Hartford
- Courtenay Hartford
- Courtenay Hartford
- Courtenay Hartford
- Courtenay Hartford
- Courtenay Hartford
- Courtenay Hartford
- Courtenay Hartford
- Courtenay Hartford
- Courtenay Hartford
- Courtenay Hartford
- Courtenay Hartford
- Courtenay Hartford
- Courtenay Hartford
- Courtenay Hartford
- Courtenay Hartford
- Courtenay Hartford
- Courtenay Hartford
- Courtenay Hartford
- Courtenay Hartford
- Courtenay Hartford
- Courtenay Hartford
- Courtenay Hartford
- Courtenay Hartford
- Courtenay Hartford
- Courtenay Hartford
- Courtenay Hartford
- Courtenay Hartford
- Courtenay Hartford
- Courtenay Hartford
- Courtenay Hartford
- Courtenay Hartford
- Courtenay Hartford
- Courtenay Hartford
- Courtenay Hartford
- Courtenay Hartford
- Courtenay Hartford
- Courtenay Hartford
- Courtenay Hartford
- Courtenay Hartford
- Courtenay Hartford
- Courtenay Hartford
- Courtenay Hartford
- Courtenay Hartford
- Courtenay Hartford
- Courtenay Hartford
- Courtenay Hartford
- Courtenay Hartford
- Courtenay Hartford
- Courtenay Hartford
- Courtenay Hartford
- Courtenay Hartford
- Courtenay Hartford
- Courtenay Hartford
- Courtenay Hartford
- Courtenay Hartford
- Courtenay Hartford
- Courtenay Hartford
- Courtenay Hartford
- Courtenay Hartford
- Courtenay Hartford
- Courtenay Hartford
- Courtenay Hartford
- Courtenay Hartford
- Courtenay Hartford
- Courtenay Hartford
- Courtenay Hartford
- Courtenay Hartford
- Courtenay Hartford
- Courtenay Hartford
- Courtenay Hartford
- Courtenay Hartford
- Courtenay Hartford
- Courtenay Hartford
- Courtenay Hartford
- Courtenay Hartford
- Courtenay Hartford
- Courtenay Hartford
- Courtenay Hartford
- Courtenay Hartford
- Courtenay Hartford
- Courtenay Hartford
- Courtenay Hartford
- Courtenay Hartford
- Courtenay Hartford
- Courtenay Hartford
- Courtenay Hartford
- Courtenay Hartford
- Courtenay Hartford
- Courtenay Hartford
- Courtenay Hartford
- Courtenay Hartford
- Courtenay Hartford
- Courtenay Hartford
- Courtenay Hartford
- Courtenay Hartford
- Courtenay Hartford
- Courtenay Hartford
- Courtenay Hartford
- Courtenay Hartford
- Courtenay Hartford
- Courtenay Hartford
- Courtenay Hartford
- Courtenay Hartford
- Courtenay Hartford
- Courtenay Hartford
- Courtenay Hartford
- Courtenay Hartford
- Courtenay Hartford
- Courtenay Hartford
- Courtenay Hartford
- Courtenay Hartford
- Courtenay Hartford
- Courtenay Hartford
- Courtenay Hartford
- Courtenay Hartford
- Courtenay Hartford
- Courtenay Hartford
- Courtenay Hartford
- Courtenay Hartford
- Courtenay Hartford
- Courtenay Hartford
- Courtenay Hartford
- Courtenay Hartford
- Courtenay Hartford
- Courtenay Hartford
- Courtenay Hartford
- Courtenay Hartford
- Courtenay Hartford
- Courtenay Hartford
- Courtenay Hartford
- Courtenay Hartford
- Courtenay Hartford
- Courtenay Hartford
- Courtenay Hartford
- Courtenay Hartford