I feel like kind of a chump. You know I love my new light fixtures and I love them a lot. The thing is, any time that I’ve needed one installed, I’ve always asked Chris to do it. And he’s always kind of taken a long time to get to it. And then there’s always all the cursing that goes on whenever he does a project like this. So it’s given me the impression that changing a light fixture is kind of a difficult thing to do that requires some skill and finesse.
Listen up all you finess-less folks! It’s so easy! Soooooo easy.
The other day we were putting up a new porch light in the back and I asked Chris if it was something that I could maybe make a post out of. So he finally showed me how to do it as if he were showing it to all you lovely people (ie. with no cursing) and it was like a light shone down from above. Well, a light did shine down from above, cause that was kind of the point of the project, but I mean like from really really above. You know what I mean.
So here I’ve been thinking he’s been doing this big difficult thing for me every time he puts in a new light, going all out of his way and doing me a big favor. Turns out it was all a show and wow did he ever have me fooled!
Here’s how it’s done!
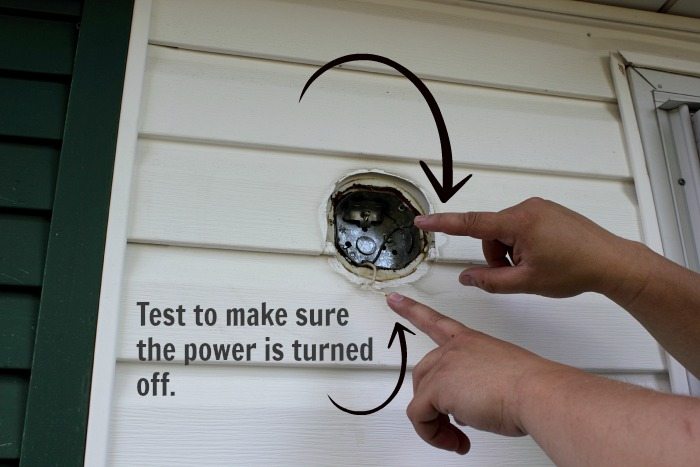
Turn off the power!
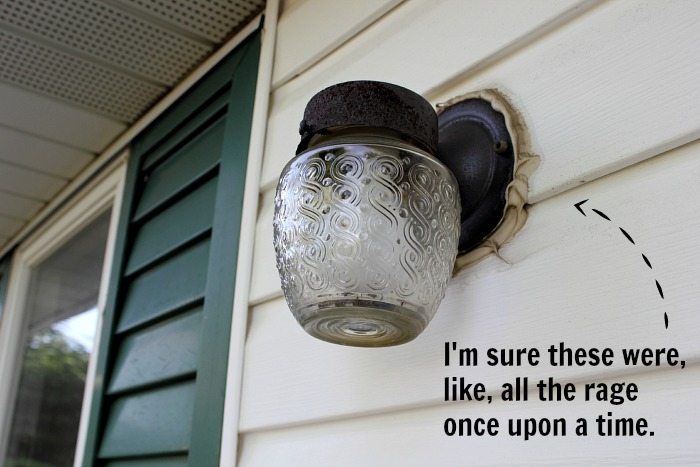
Locate your old light fixture and peel or cut away the old caulking if it’s an outdoor light. Unscrew the screws and pull it away.

Disconnect the wires and toss that old light fixture to the curb! Or do a craft with it. Whatever.
Kidding!
Well, do test the power, but not like that.
Do it like this:
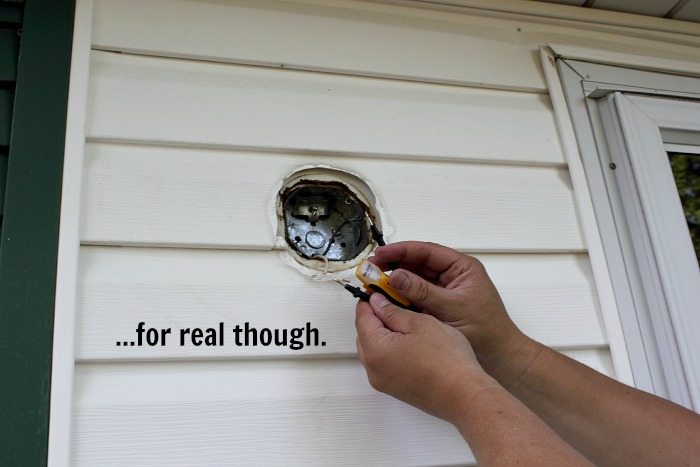
Get one of these little voltage meters to make sure the connection isn’t live. Safety first!
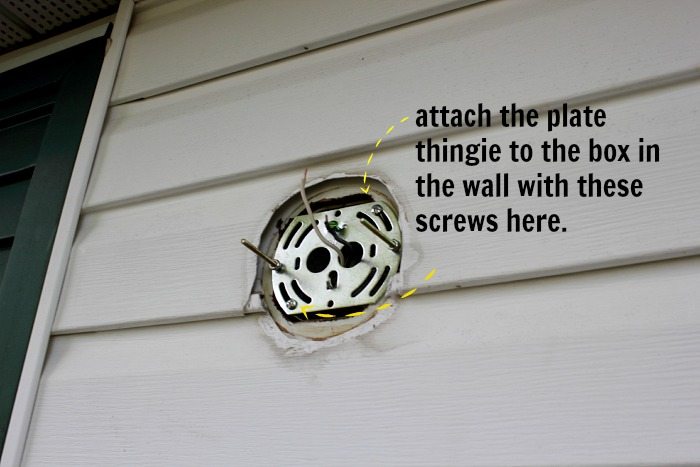
Your new light fixture will come with a mounting plate. Stick it on there. Like so.
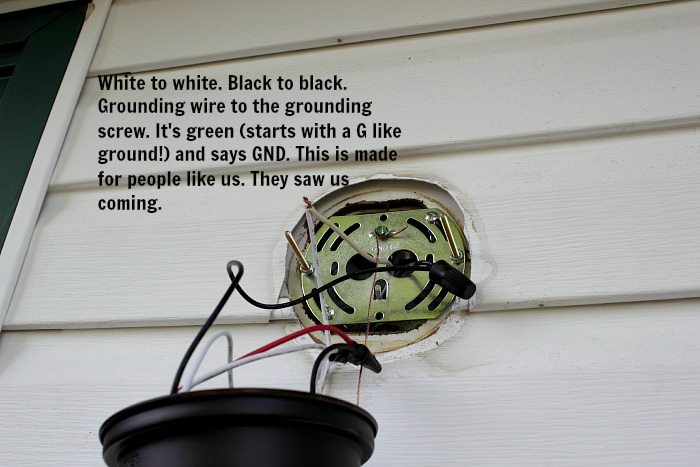
It’s time to wire your new light fixture! Twist together the ends of the wires on the light to the ends of the wires on the house. White to white. Black to black. Take the grounding wire (it’s the other one that’s neither white nor black) and wrap it around the grounding screw. Tighten the screw. Take the little threaded caps and screw them right onto the tops of your black and white twisted wires.
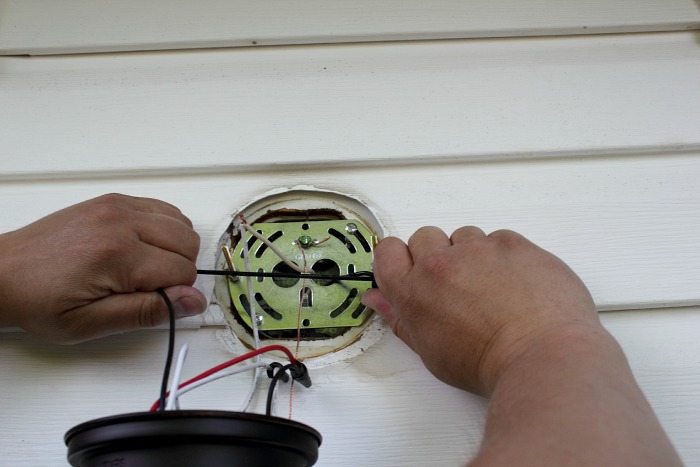
Tighten those caps really well. Now pull on them with all your might! They shouldn’t come off! If they do, tighten them again, but more.
Now put your light up onto the mounting plate and secure it with the little decorative bolts that come with it. Put some caulking around it if you’re working with an outdoor light.
Done!
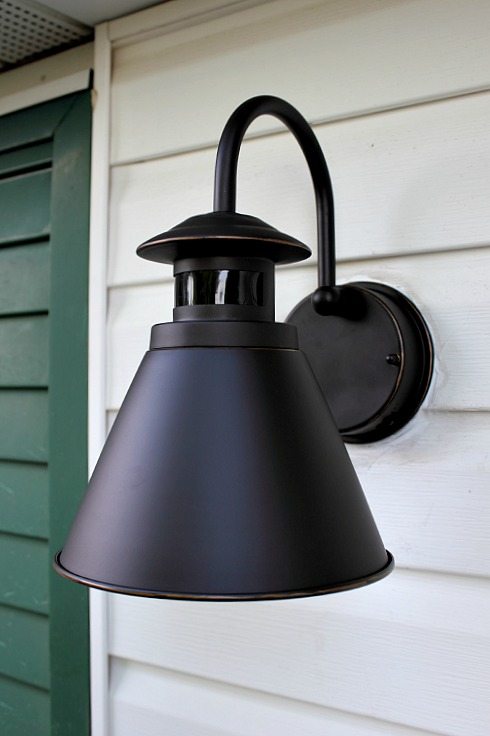
Admire your handiness because, by the way, you’re handy now.
So there you have it! You totally can do it yourself! Now I can put up all of my own light fixtures and free Chris up to do other projects that are actually challenging.
Courtenay for the win. 🙂
This post contains affiliate links.

Courtenay Hartford is the author of creeklinehouse.com, a blog based on her adventures renovating a 120-year-old farmhouse in rural Ontario, Canada. On her blog, Courtenay shares interior design tips based on her own farmhouse and her work as founder and stylist of the interior photography firm Art & Spaces. She also writes about her farmhouse garden, plant-based recipes, family travel, and homekeeping best practices. Courtenay is the author of the book The Cleaning Ninja and has been featured in numerous magazines including Country Sampler Farmhouse Style, Better Homes and Gardens, Parents Magazine, Real Simple, and Our Homes.