Painting interior doors is a great way to freshen up any indoor space. Get the job done quickly and done well with this step by step door painting guide.
 I’ve been on a bit of a door painting kick around here lately. First, I updated the inside of our front door with a brighter color (which I’m surprisingly still really enjoying), then we started updating a few other interior doors in our home so I’ve had to paint those too. Painting interior doors always seems like a job that will be really quick to finish, but I’ve definitely found myself getting wrapped up in trying to get everything just perfect and I’ve definitely had it take me hours just to paint one door as a result from time to time. I think I’ve figured out a pretty surefire method for getting the job done really quickly and also really well though, so I thought I’d share a few of my best efficient door painting tips with you today, along with my exact method for painting interior doors.
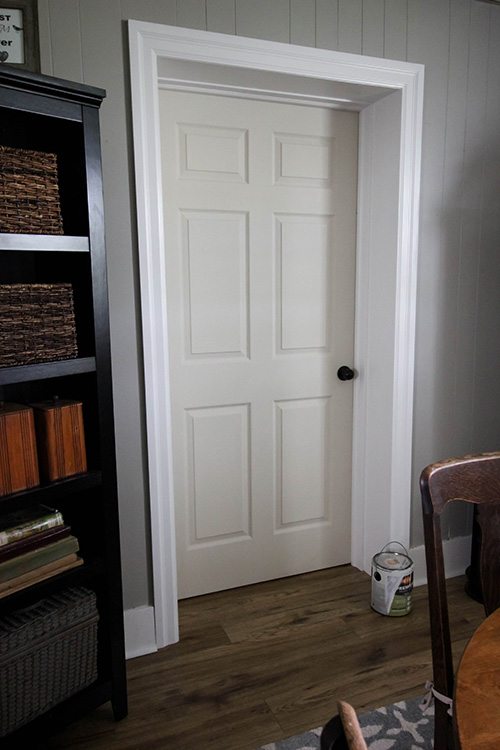
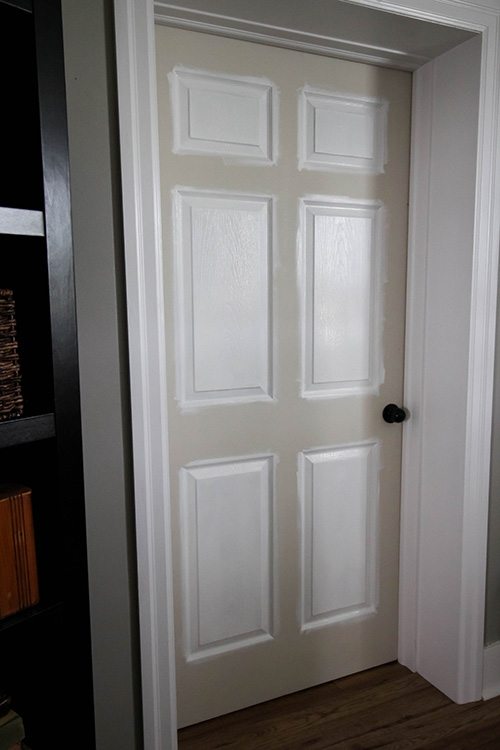
First of all, here’s the door we’ll be working with today. This is the door that leads into the master bedroom from the dining room. It used to be one of those plain, flat hollow core doors from 30 or 40 years ago and it also swung open into the tiny dining room, which took up a lot of floor space and was just plain awkward. The wall between these two rooms is an old exterior wall because the master bedroom is an addition, so the wall that the door sits in is super thick. Since the bedroom is so big, and to help maximize floor space in the dining room, we moved the door back in the wall opening towards the bedroom and also changed it so it now swings into the bedroom when it opens. As a bonus, we have this neat opening that’s visible in the dining room now with lots of big, chunky trim work. Yay!
When we did all of that door-changing, we also bought and installed a new door and that’s what I’m painting today! We still have a lot of door changing to do in this house, so it’s a good thing I’m starting to get really good at painting interior doors!
Painting Interior Doors
So here’s how I paint a door super efficiently!
Start With the Panels
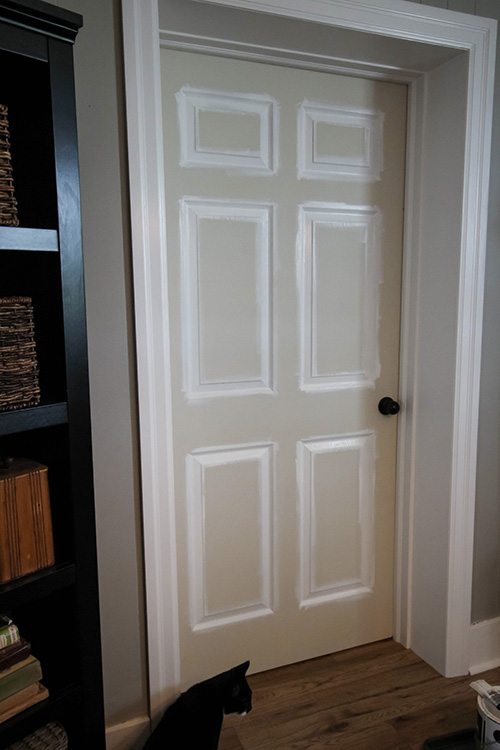
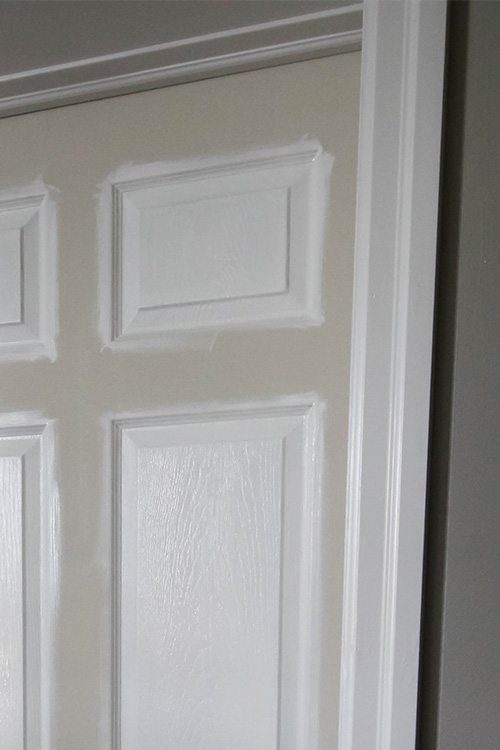
The first thing that I do is to paint the outline of any panels on the door. I’m super specific about how I do this because this is something that you can get really fussy about and have it take 10 times as long as needed. I load my brush with paint and paint the two vertical sides of the first panel, trying to only limit myself to one or two brush strokes. When you do this, try not to worry about any missed corners or drips, because you will usually pick those up naturally when you do the horizontal parts and you’ll save yourself so much time if you don’t fuss here.
Next, I load my brush with paint again and do the horizontal parts, again trying to stay very conscious of keeping my brush strokes to a minimum.
Repeat this for all the other panels!
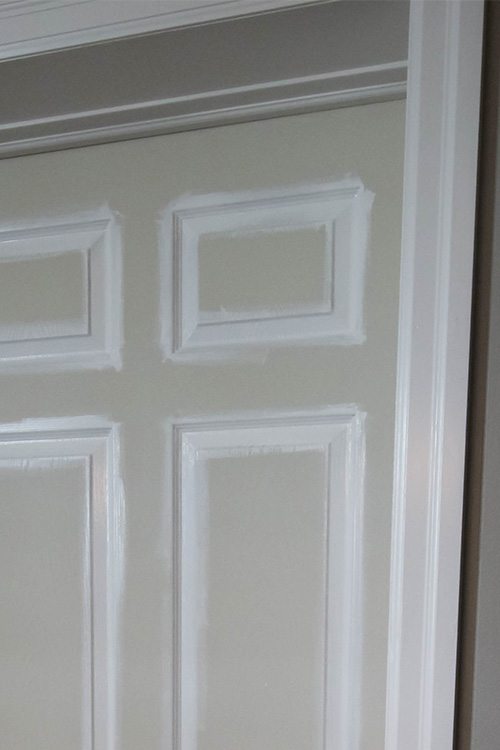
You may need to load your brush a little more often for some of the larger panels, but try to always focus on not fussing too much and on using as few brush strokes as possible.
Paint Inside Each Panel
Next I tackle the inside part of each panel. This is a really fun part of the process because you cover a lot of area really quickly. If your door is textured, I recommend using a brush because the textures on these door can be quite deep and a brush is best to get into every nook and cranny without missing too many spots. If your door is flat though, definitely go for the little foam roller!
Make it Fun!
I like to play a little game at this point and see how much I can get done in 4 minutes, so I set the timer on my phone for that amount of time and dive right in. If you’ve read my book The Cleaning Ninja, this is probably a fairly familiar concept to you. Basically, setting a timer keeps you super mindful of everything you’re doing and how long it’s taking you, and it keeps your mind sharp because it breaks the time up and makes it feel like things are moving along more quickly! It’s also super fun when you set a little goal for yourself, like saying that you’ll try to finish three panels in 4 minutes. The fun part comes when you blow your goal out of the water and pat yourself on the back. We can do so many more things, so much more quickly than we realize, including painting interior doors, and finding that out never gets old!
Paint the Rest
Once all those panels are painted, I move on to the rest of the door. Again, feel free to use a roller if your door is smooth, but if it’s textured like mine is, a brush will be your friend. Either remove the door knob or tape it up to keep it looking clean and beautiful, then open the door slightly to make sure you can get right to the edge all around. Since I’m pretty short, I like to stand on a chair and start with the top third of the door. I do the horizontal sections first, then move on to the vertical sections.
When the top 1/3-ish is done, I move on to the bottom two thirds and complete them in the same way.
Apply Second Coat
I’ll then go do something else for about 15 more minutes (like fold a load of laundry) and repeat the whole process for coat number 2!
Actually, instead of telling myself that I have to do one more coat, I usually think of it as only another 1/2 coat to do, since the first coat usually covers most of everything anyway. Telling myself I’m in the home stretch gives me a little boost and a feeling of momentum that keeps me from getting slow and distracted. It happens to the best of us! 🙂

And that’s it! Overall, painting a door only takes up a little more than 30 minutes of my day, but it’s a really satisfying little project that really freshens up my home. Painting interior doors is kind of like painting a ceiling: You don’t really think you need to do it that badly, but once you do, you realize how much cleaner and fresher your home feels. And if you’re looking to make a really stylish impression, painting your doors a unique color, or even plain black, really has a big impact for very little invested time or money.
Most Efficient for Most of us
And before anyone says it, yes I know that this isn’t really the most efficient way ever, but it works really well if you’re just working your way through your doors one at a time like I am. If you’re looking to do a whole house of doors all at once though, and you don’t mind taking all of your doors off their hinges and bringing them outside, definitely get yourself a sprayer. 🙂
Do you have any doors in your home that could use a fresh coat of paint?
MORE TIPS LIKE THIS
- How to Paint a Ceiling Without Losing Your Mind
- How to Paint Absolutely Perfect Wall Stripes
- Easy to Install Heated Flooring
- How to Paint Old Wall Paneling
- How to Make Beautiful Wood Flooring Out of Basic Lumber
- The Creek Line House Renovating and DIY Idea Archives
This post contains affiliate links.

Courtenay Hartford is the author of creeklinehouse.com, a blog based on her adventures renovating a 120-year-old farmhouse in rural Ontario, Canada. On her blog, Courtenay shares interior design tips based on her own farmhouse and her work as founder and stylist of the interior photography firm Art & Spaces. She also writes about her farmhouse garden, plant-based recipes, family travel, and homekeeping best practices. Courtenay is the author of the book The Cleaning Ninja and has been featured in numerous magazines including Country Sampler Farmhouse Style, Better Homes and Gardens, Parents Magazine, Real Simple, and Our Homes.