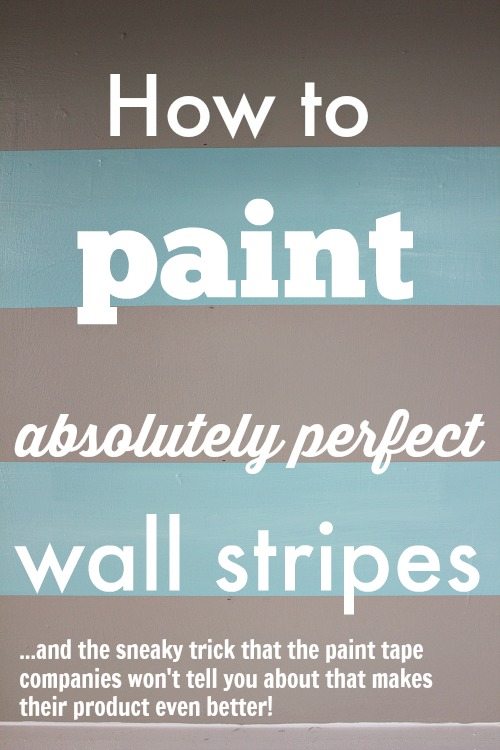
I’ve always loved the look of wall stripes, but I’ve been reluctant to actually go through the effort of measuring and taping things off because I was honestly a little intimidated.
I mean, after putting in all of that work, the end product had better be pretty amazing, right? And perfect. And I don’t usually do perfect. I do “nearly perfect”, or “really imperfect but not so noticeable”, but not perfect.
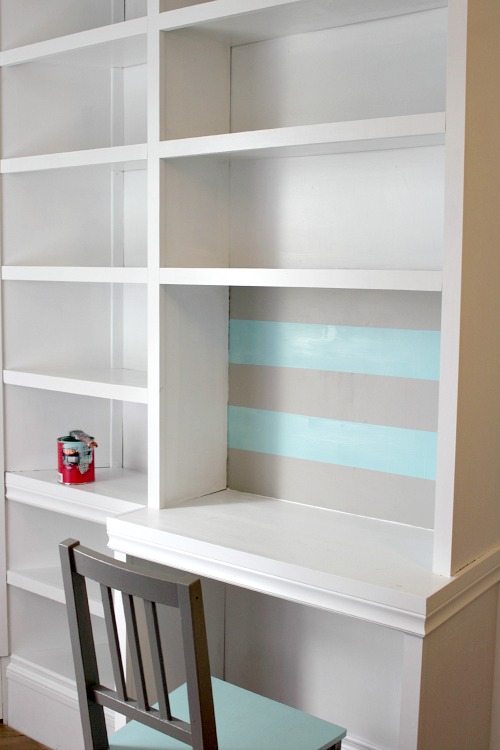
I wanted to add a little extra detail to the back of the built-in desk area in Kennedy’s room though and I thought it was the perfect area to try out the stripes.
I normally don’t use tape when I’m painting a room because I find it just makes the job take longer and I’m pretty comfortable free-handing my edges with an angled brush at this point.
For this project though, a good painting tape is really worth it.
If you’ve ever used any of the painting tapes before, you’ve probably noticed that they aren’t totally perfect. Even if you use a high quality tape, you’ll still often end up with paint bleeding and little blips here and there just because of user error or weird humidity or something like that. After I show you this little trick in a second here, you’re going to LOVE your painting tape. I promise!
So here’s what I did for this little project:
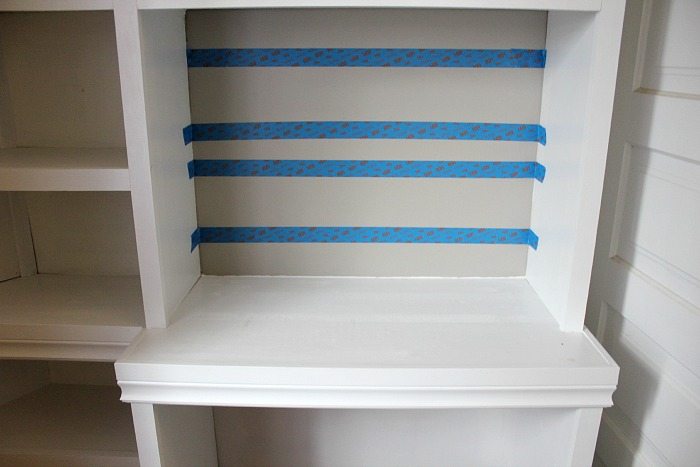
After painting my base color (the grey) and letting it dry, I decided I wanted a total of 5 stripes, so I just needed to tape off 2 stripes that I would paint on top in the aqua color. I measured where my lines for the edges of the aqua stripes would need to go and marked 3 little dots per line, then I connected the dots with my painting tape, making sure to tape OUTSIDE the stripes that I would be painting on.
Now it’s time to go ahead and paint the aqua stripes on, right? WRONG! Here’s the trick! 🙂
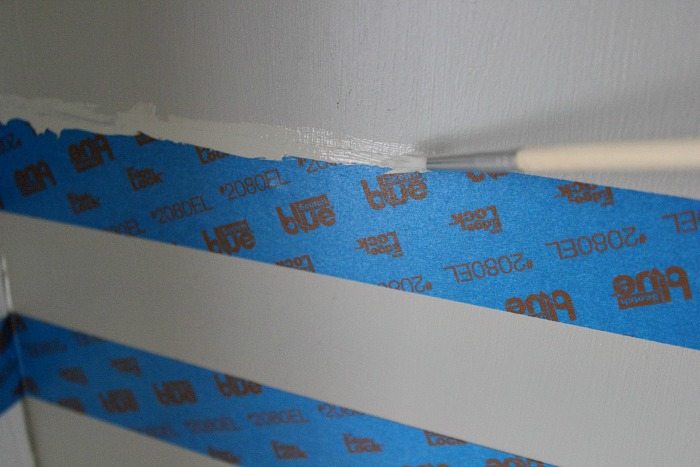
I went back over the inside edges of the tape (where the aqua would be going) with the grey color again to really seal the tape down. Any bleeding that occurs when you do this will be the base color and will be invisible! The second part of this tip is to use a thin artist’s brush or even something like a q-tip to do this step. That way you use way less paint and you don’t have a whole big brush to clean afterwards. Just a quick rinse (or a toss in the trash) and you’re done!
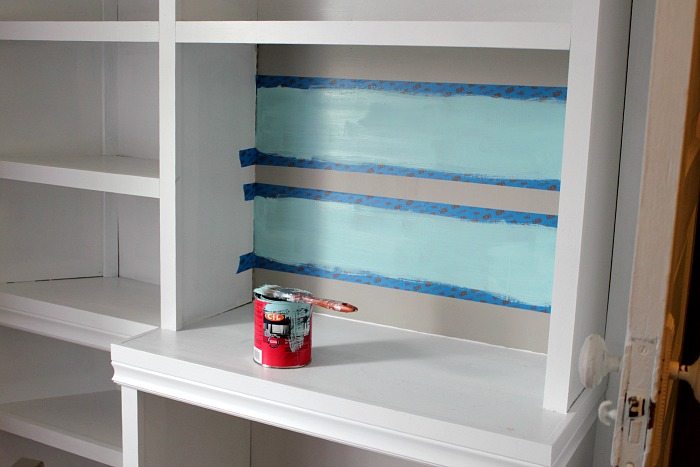
So after that little 2-minute step was done, I went ahead and added the aqua.
Then it was time to peel back the tape!
The results were nothing short of thrilling.
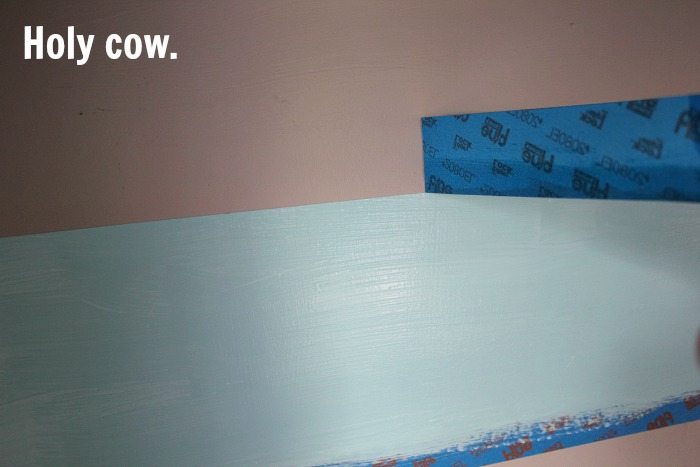
Now that is one perfect paint line!
Here’s how the whole desk area looked when I was done.
This project could have been a disaster with so many lines and so many opportunities for mistakes, but it was really just a completely satisfying way to spend a morning!
The next time you think you might like to try something a little fancy with painting tape and more than one paint color, give this little trick a try!

This post contains affiliate links.

Courtenay Hartford is the author of creeklinehouse.com, a blog based on her adventures renovating a 120-year-old farmhouse in rural Ontario, Canada. On her blog, Courtenay shares interior design tips based on her own farmhouse and her work as founder and stylist of the interior photography firm Art & Spaces. She also writes about her farmhouse garden, plant-based recipes, family travel, and homekeeping best practices. Courtenay is the author of the book The Cleaning Ninja and has been featured in numerous magazines including Country Sampler Farmhouse Style, Better Homes and Gardens, Parents Magazine, Real Simple, and Our Homes.