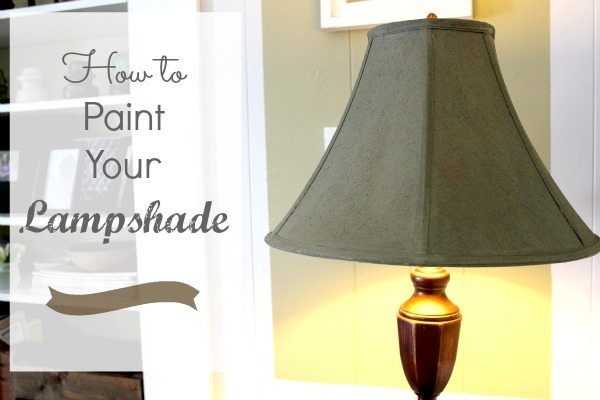
What do you do if you have a lampshade that is just the right shape and size but not quite the right color? Do you throw it out? No! You paint it! Here’s how to paint a lampshade.
This was such a fun little DIY. And easy too. I was giving this corner of my living room a little face-lift a couple of weeks ago (Yes, yes. I’ll show you real soon!) and my plain old off-white, kinda stained, nothing special lamp shade really started to bug me again.
A few hours later, when I was sitting in the parking lot at Kennedy’s school, I found myself dreaming up ideas for changing it up a bit. As usual, the simplest, easiest idea won out. I wasn’t sure if it was going to work, but I could always just cover it in fabric. Or use one of the umpteen lamp shades hiding out in my basement.
I asked Kennedy if she would help me and, of course, she agreed! What kid wouldn’t want to do something ridiculous like paint their mom’s lampshade?
Can You Paint a Lampshade?
Yes, you absolutely can, but after painting lamp shades of a few different styles and using them to decorate my home, I have a few important painting tips to share. It isn’t quite as easy as slapping a coat of paint on and calling it done, but it isn’t much more difficult, either.
I recommend against using spray paint, even though that might seem like the quickest and easiest way to tackle this makeover project. Using a paint brush and paint will give you much more control over your paint job and allow you to monitor the process for even coverage and to watch the paint adhere to the cloth or fabric smoothly. I’ve seen this project done with spray paint and I didn’t think the results were nearly as nice as what I was able to get with a simple paint can and a brush.
There are many different types of paint for different specialized purposes, but I’ve always used regular latex wall paint, like you would use to paint a room. If you have some extra paint from a small paint sample jar, this is a great project to use that for.
A matte or eggshell finish will work most seamlessly to bring new life to a lampshade, but I used a pearl or satin finish and it worked just fine. I wouldn’t suggest using high-gloss paint for this DIY painting project because you’ll almost definitely end up with some areas that are much shinier than others and it will create a messy-looking finished product.
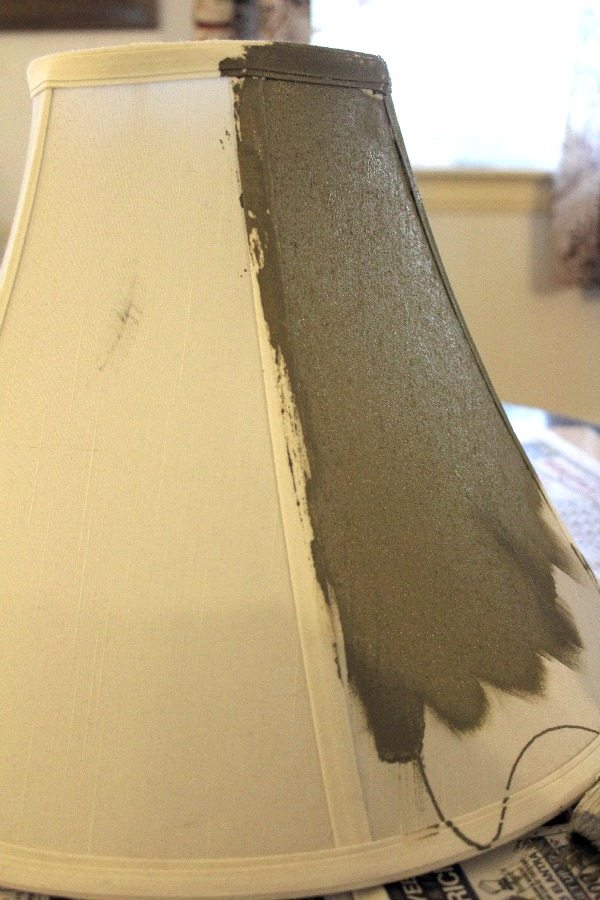
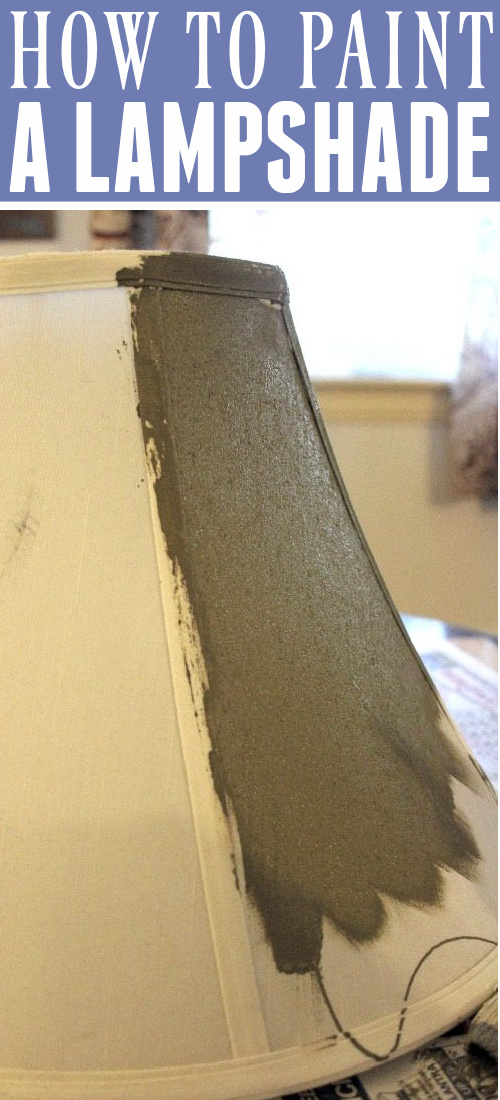
We used a sample pot of regular wall paint that I had in a Martha Stewart color called Crevecoeur.
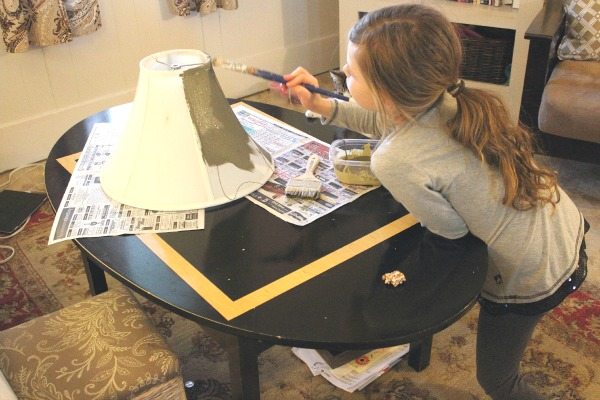
We basically just slopped it on until we thought it looked pretty good. All in all it took about 20 minutes. Notice the little piece of after-school granola bar sitting on the coffee table there.
Here’s the trick: When you think it looks good and all the spots are covered, you put the shade back on the lamp, turn it on, and continue painting it until no more light shines through. It was incredibly easy to get good coverage, actually. You can see that after our initial covering, there were only a few little areas that needed extra paint!
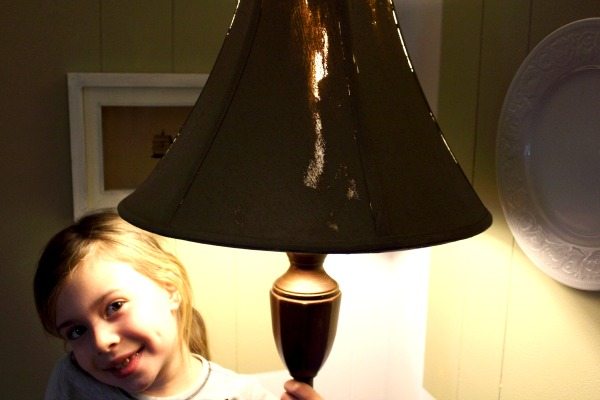
The Finished Painted Lampshade
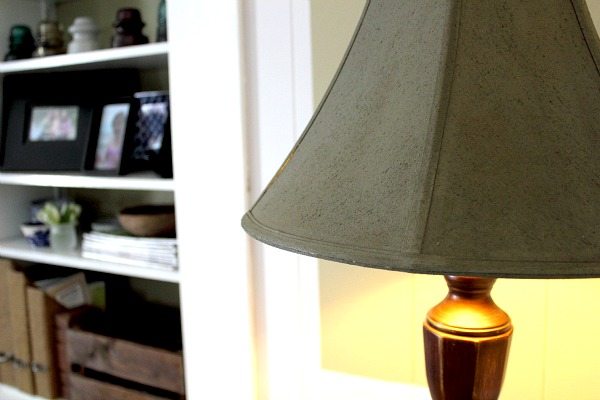
I absolutely love this lamp in the corner of our room now. It focusses the light perfectly and the dark shade really classes things up quite a bit.
More photos of the whole corner refresh coming up soon!

Courtenay Hartford is the author of creeklinehouse.com, a blog based on her adventures renovating a 120-year-old farmhouse in rural Ontario, Canada. On her blog, Courtenay shares interior design tips based on her own farmhouse and her work as founder and stylist of the interior photography firm Art & Spaces. She also writes about her farmhouse garden, plant-based recipes, family travel, and homekeeping best practices. Courtenay is the author of the book The Cleaning Ninja and has been featured in numerous magazines including Country Sampler Farmhouse Style, Better Homes and Gardens, Parents Magazine, Real Simple, and Our Homes.