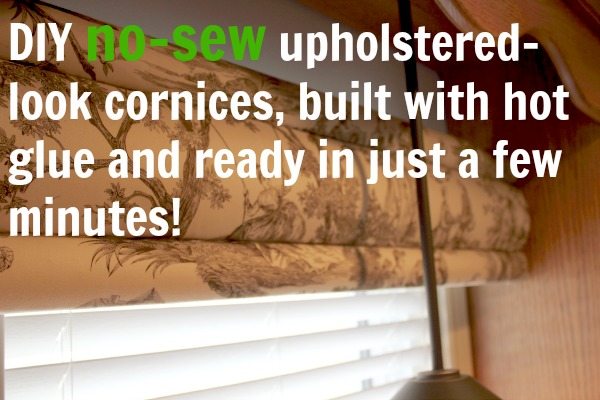
I recently had the chance to try out these really neat DIY cornice kits from The Cornice Store.
First of all, let me tell you: This was pure fate. Serendipity of the window coverings!
I had been planning to make my own cornices for the kitchen. I had already purchased the fabric. I had pitched the idea to Chris and he had kinda shrugged and seemed disinterested in the general idea of the project as usual.
When The Cornice Store offered to let me try out their kits, I jumped on it! They had me at hot glue! The whole process is really easy, quick, and the end result is completely professional-looking. You won’t believe you did it yourself!
Let me show you how I did it!

The forms are made out of light weight styrofoam and come shipped in easy to work with sections.
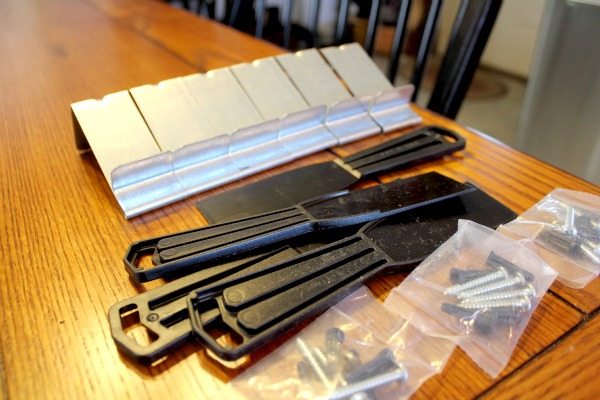
You also get brackets, hardware, and a tuck tool. Actually, they sent me four tuck tools, but you really only need one. I’m keeping them though. They’ll make great scrapers too!
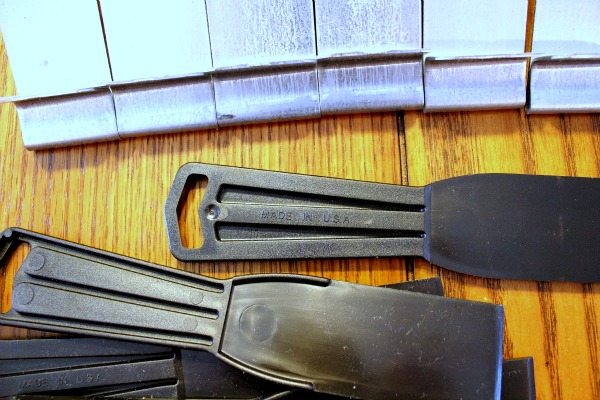
How often do you see something plastic like this that was made in the U.S.A.?

The instructional DVD is awesome. First of all, the decor styles and dress of the facilitators are completely dated and therefore super entertaining to watch, but beyond that, it’s actually really helpful. It takes you through the basic step-by-step process and gets you ready to go!
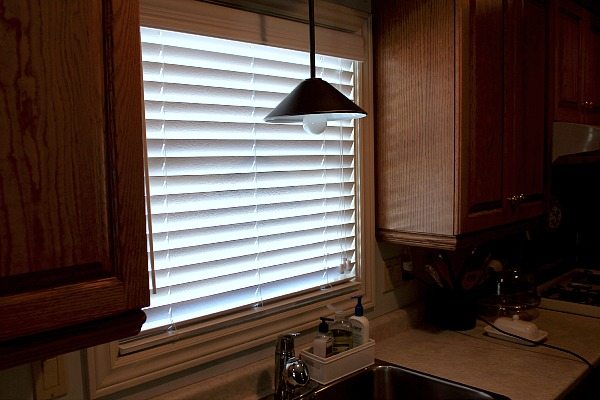
Here’s a picture of one of the three windows I was working on before, with no cornice and just some 2 inch faux wood blinds.
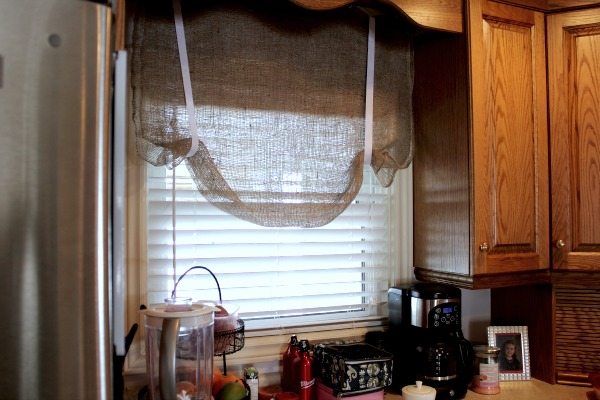
Previously, I had made these rustic burlap valances in the Fall, just for fun. They were fine for then, but it was time for something a little more polished. Even though we’re not ready to tackle painting the cabinets and replacing the countertops in the kitchen, it’s time to make it feel a little more finished and comfortable.
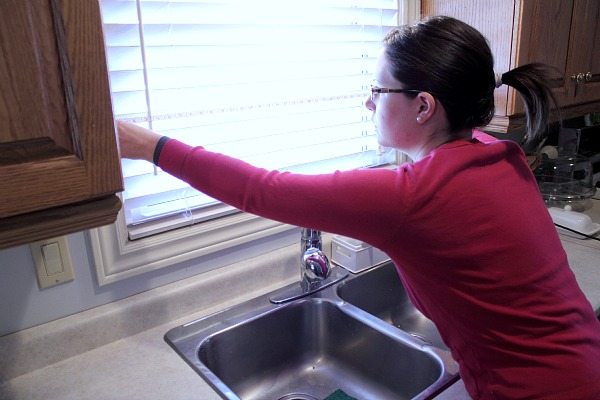
When the burlap was down, I measured the window from side to side including the moldings. Since this window was sandwiched between two cabinets, we realized we would just need one straight piece of cornice for a nice clean look and wouldn’t need to attach the end cap pieces.
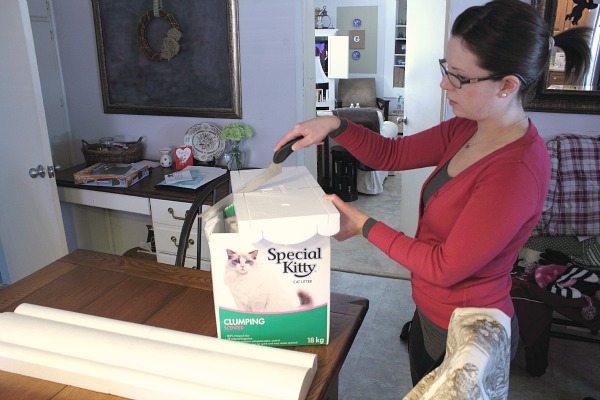
I laid out two section pieces end to end and then trimmed a bit off of the third piece to make up the 40 inches that I would need total. I used my very best empty cat litter box to cut on. It was actually great because it caught any little pieces of styrofoam that came off. The video suggested using a little saw or a utility knife for the cutting. I used a serrated kitchen knife just to see if it would work and it was great!
You can see this is the classic “real life”: shot. I was playing around with this while Kennedy had a friend over and they were busy making a mess just outside of the camera shot. I liked that I could just do it right in my kitchen without needing to go outside or get a bunch of special tools out (besides that fancy cat litter box of course.)
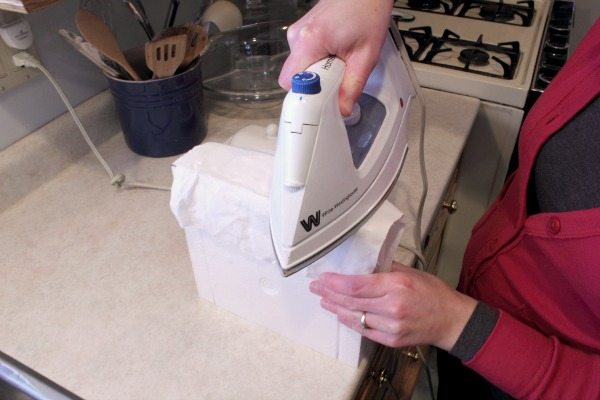
If my cuts were ever a bit rough, I was able to smooth them out using a piece of scrap fabric layered over the rough part. Then I just ironed gently on a fairly low setting. It worked like a charm!
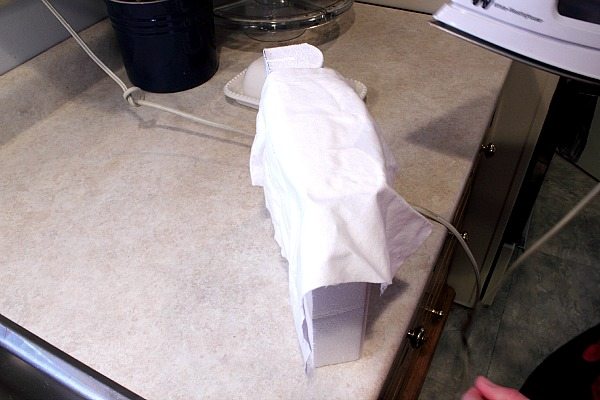
Once I had my pieces measured and cut, I got to use the hot glue!

The pieces were attached using a low-temp glue gun. They suggest not using a high temp because it will melt the styrofoam. They also say that you should have a full-sized glue gun instead of a mini one. I don’t have a full-sized one, but being the hot glue enthusiast that I am, I have two glue guns. I just plugged in both so I had plenty of glue at the ready. It doesn’t take much!
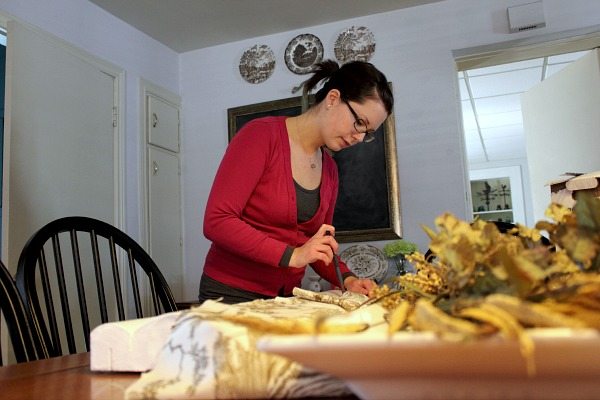
Then it was time to decorate! This style of cornice needs three strips of fabric. They give you suggestions for how wide you should cut your strips, depending on the weight of your fabric. I was using a medium weight cotton drapery fabric and I cut all three strips to 9″ wide, with plenty of length just in case I messed up. I later learned that this is pretty hard to mess up though!
The cornice kit that I was using had a 9″ drop (height) total, but they also come in chunkier sizes with 12″ and 15″ drops, so you’d cut wider strips for those sizes.
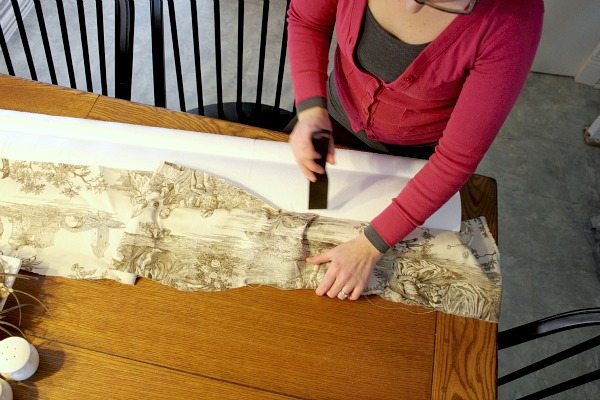
All I had to do was lay my fabric over the cornice and use the tuck tool to push it into the cracks on the front and the back to secure it in place! I started with the two outer strips and finished off in the middle. I learned that it’s very forgiving and any extra you have peeking out can be tucked away into the cracks, never to be seen again!
I went for this really simple look, but you can also add in cording, or beading or really any kind of trim you like along the two “seams” in the middle to separate the three sections. Just make sure you get the kind of trim with a tab on it, so you can tuck it in and leave just the cording or trim showing. I’m thinking maybe a little bit of red beading at Christmas time! It’s so easy, I just may get carried away here.
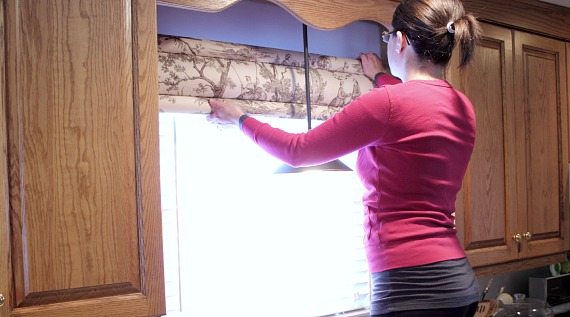
To hang them, I just had to drill the brackets onto the wall and push the cornice onto the brackets anywhere in the back fabric tucking spot. So easy!

Just look at that professionalism! It’s like I’ve been doing this my whole life!

Here you can see how it butts up right against the cabinets. The ends were finished by just folding the excess fabric over the ends and then tucking them into the back. Even if you have a ton of extra fabric, just keep tucking! It will fit! You can’t get a much crisper end than that.
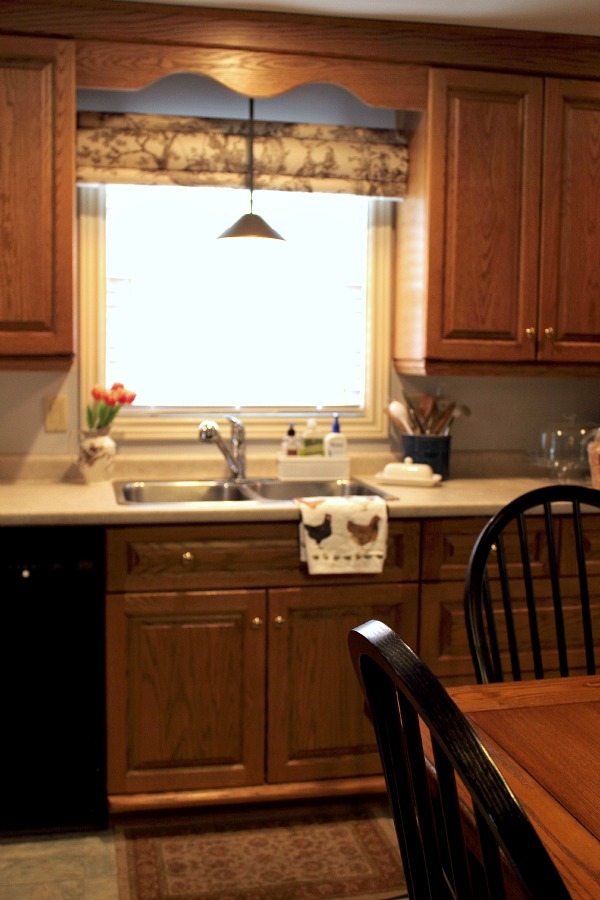
The overall effect over the kitchen sink, with my new table and chairs in the foreground. It’s just the look I was hoping for! Note the chicken tea towel. If I really had it together, I’d make a DIY tea towel from kid’s artwork! I think that would be just the thing to distract from my weird orange cabinets!
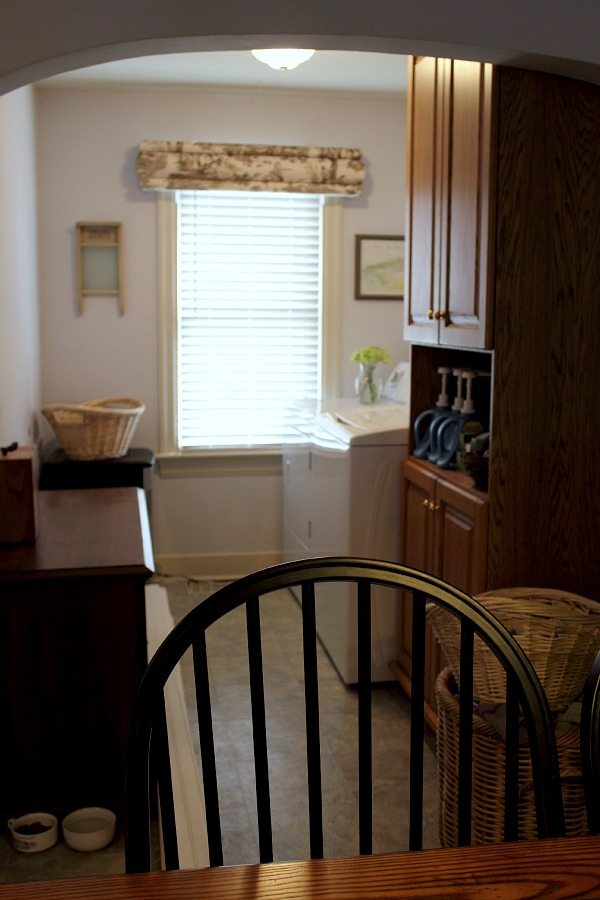
Another cornice went up in the laundry nook off of the kitchen.It really ties that area into the rest of the space.
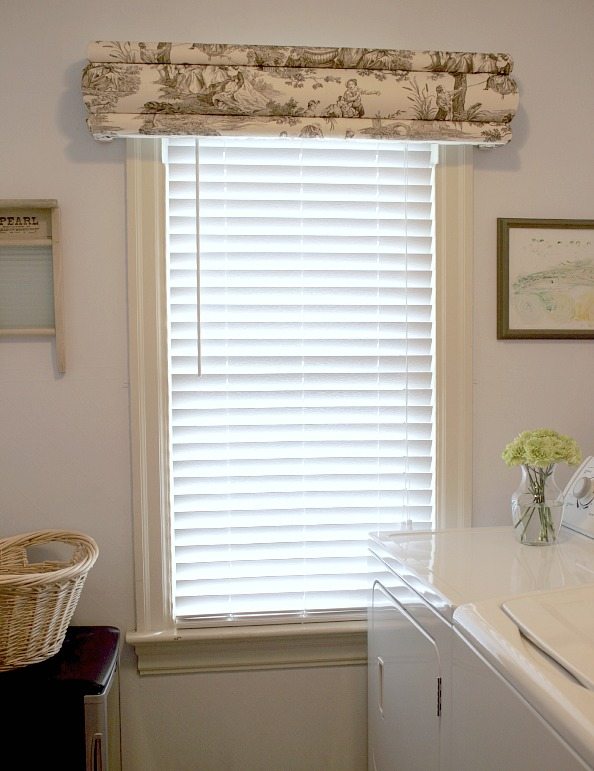
We were able to use the end cap pieces in this room and they really didn’t make the process any more complicated at all! During the hot glue building stage, I just attached the end pieces to the long piece that I’d measured and cut for the front. Covering them in fabric was just as easy. When I got to a corner, I just folded it in a way that looked nice and neat to me and tucked it in place with the tuck tool.

I couldn’t be more pleased with my new window coverings. I got to customize them and use the exact fabric I wanted and I got to do a fun DIY project too!
If you’re thinking about a cornice-style window covering, I’d strongly suggest you go visit the nice people over at The Cornice Store!
P.S. If you happen to be a retailer in Canada and you’re reading this, the people at The Cornice Store tell me that they are looking for people to sell their cornice kits in Canada. If it’s something that you’d like to look into, their contact information can be found under “Contact Us” on CorniceStore.com.
Disclaimer: I wasn’t paid for this post, but I was provided the cornice kits free of charge to try out. All opinions and suggestions about using cat litter boxes and kitchen utensils in your DIY projects are my own.


Courtenay Hartford is the author of creeklinehouse.com, a blog based on her adventures renovating a 120-year-old farmhouse in rural Ontario, Canada. On her blog, Courtenay shares interior design tips based on her own farmhouse and her work as founder and stylist of the interior photography firm Art & Spaces. She also writes about her farmhouse garden, plant-based recipes, family travel, and homekeeping best practices. Courtenay is the author of the book The Cleaning Ninja and has been featured in numerous magazines including Country Sampler Farmhouse Style, Better Homes and Gardens, Parents Magazine, Real Simple, and Our Homes.